In the last months I had deployed a new infrastructure based on Microsoft Azure Stack HCI. If you already don’t know what is the solution, we are talking about the evolution of “old” Microsoft Storage Space Direct (S2D) model – already renamed Azure Stack HCI in Windows Server 2019.
Behind the scenes, if you have tested the stack with Windows Server 2016 or 2019, nothing is really changed in terms of management because Windows Admin Center is still the main console to manage the infrastructure.
There are many differences with the past, in particular around network stack but the real one is the full integration with Microsoft Azure, because the integration is mandatory and is the core to extend the power of this solution.
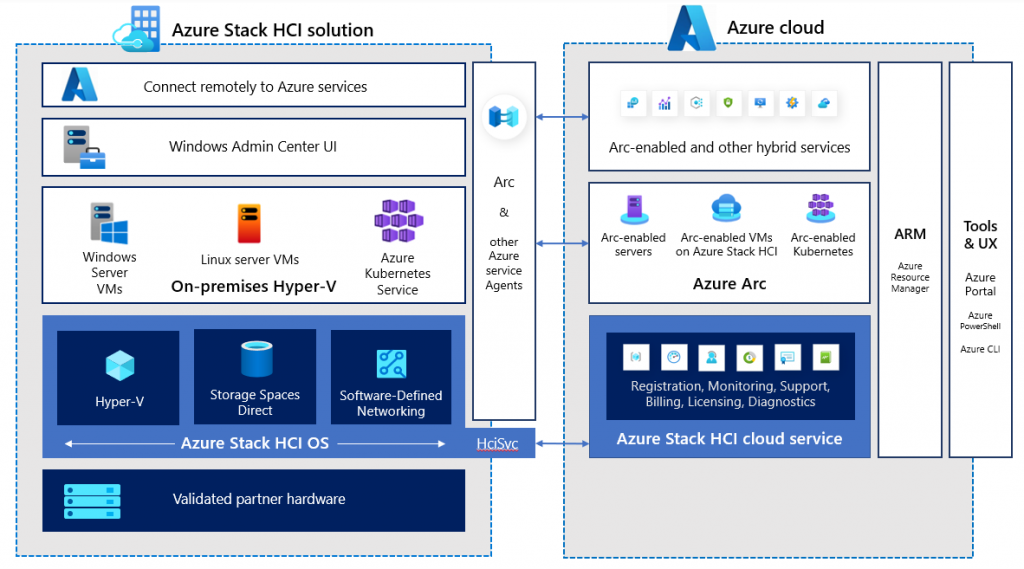
Azure Arc is another important actor in this model, because is the service that allow the management and monitoring of your hosts, and VM as well, from cloud directly.
Migration to Azure Stack HCI
How to migrate the virtual machines from S2D cluster or classic Windows Server Hyper-V cluster to Azure Stack HCI?
The first option is the classic “backup and restore” procedure but is slow because require a large maintenance window to shutdown the VM, backup and restore to new infrastructure.
Another solution is shutdown the VM and copy this to new infrastructure. The operation time could be much faster but is require importing the VM at beginning into one of the Hyper-V node and later into the new cluster.

The last option is to create a replica between to infrastructures: this gives you the possibility to set the replica in advantage and the downtime is reduced….but….there’s a but! Maybe you don’t know this, because in our mind is implicit, but Microsoft don’t support replica between different system! The official docs – Migrate to Azure Stack HCI on new hardware – Azure Stack HCI | Microsoft Learn – reports:
Hyper-V Live Migration and Hyper-V Replica from Windows Server to Azure Stack HCI is not supported. However, Hyper-V replica is valid and supported between HCI systems. You can’t replicate a VM to another volume in the same cluster, only to another HCI system.
The solution? You can use Veeam Backup & Replication! Let’s go to see how to achieve the goal.
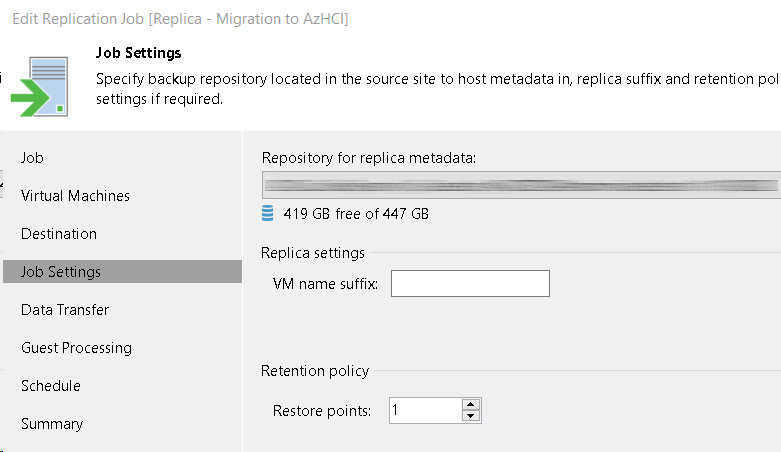
The first step is creating the replica plan with one or more VMs.

Depends by your network but you can run the replica during working hours or outside, to avoid network impact to end-users. The good thing around replica is to decide which virtual machine switch to the new infrastructure – based on potential impact to your users.
The bad thing is that Veeam uses the VM guid for folder name and split also the virtual disks into different subfolders based on SCSI value (ex. SCSI-1).
During the first wizard, remember to set a single recovery point because we need only the latest version and because this helps you to make faster the procedure.
Ready for the switch? When you are ready, there are some steps to follow:
- Stop the source VM
- Run the replica job again to align the delta
- Consolidate destination VM
How to move?
There are two options: the first one is use Veeam to run the Failover procedure. This can automate the process to avoid errors.
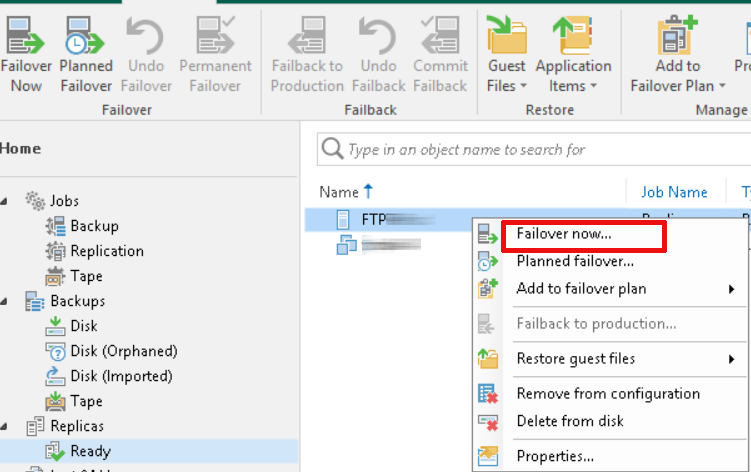
The second option is do the failover procedure manually, that give more control, but you must follow some steps:
- Turn-off the source virtual machine
- Run the replica task again to close the delta with destination
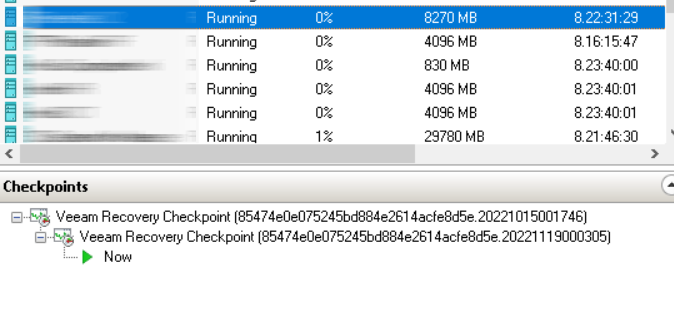
- Consolidate the checkpoint status from destination VM
- Add the Virtual Switch and eventually VLAN (this is suggested also for auto-failover)
Processor Configuration
What happen if you want migrate a VM deployed into a node based on Intel Xeon Gold 6230 into a node based on Intel Xeon Gold 6324? From Windows prospective, nothing but from hypervisor prospective a lot, in particular if you don’t change NUMA parameters because this can impact on HCI performance. So, before start the VM, be sure to Reset the NUMA Topology.
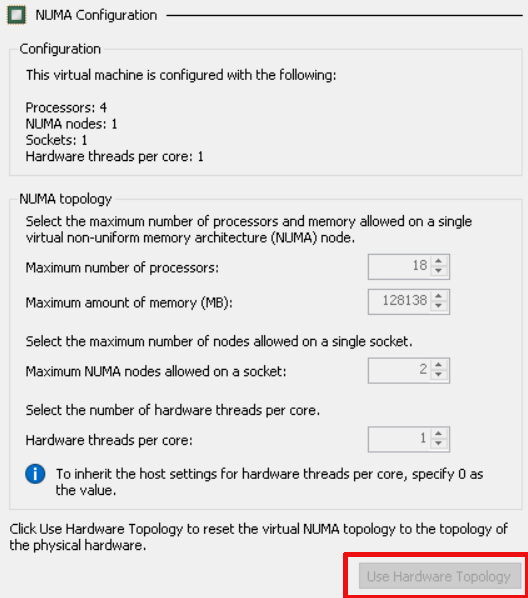
It’s also important review the resource assignment: the new CPU are more efficient, even the Core number al less than past but the architecture is much evolute and this means better with less. So, the VM with 8 vCPU now could run with 6 vCPU…
VM Configuration Upgrade
The last step is update the VM Configuration from version 8.0/9.0 to version 10. Why this is necessary? Upgraded virtual machines use a new configuration file format, which is designed to increase the efficiency of reading and writing virtual machine configuration data. The upgrade also reduces the potential for data corruption in the event of a storage failure.
More information about VM Configuration, check this article – Upgrade virtual machine version in Hyper-V on Windows or Windows Server | Microsoft Learn
The Future from Microsoft
During last Microsoft Ignite, the product team has announced the next release of a Migration Tool to move VMs easily, from standalone Hyper-V or cluster infrastructure, with an appliance that will be installed on Azure Stack HCI.
Conclusion
Even Microsoft doesn’t support the migration, there’s a cool solution from Veeam. The replica give you the possibility to manage better the migration plan outside the business hours.
#DBS


