
Questo articolo è disponibile anche in lingua italiana al seguente link: Usare Azure AD Password Protection per aumentare la sicurezza delle password – WindowServer.it
Password hardening is one of the most important points to keep safe your IT infrastructure. A good policy plan, avoid issues to compromise password inside and outside your edge.
In the past there was the idea to change the password every 3 months but for the end-user this was a big boring so they just change the last value to move around the problem (es. MyLittleDog!1 – MyLittleDog!2). With Windows 10 the idea to have the Password-less model, thanks to Windows Hello for Business, has changed everything: the IT Admins can force users to set a strong password and use a PIN, or Biometric system, to login into machine.
But, at the end of all, the problem behind the scenes still present and this because in Active Directory there’s no way to create black list words, unless use third part solutions. The reflection of this problem is also in Azure Active Directory where there’s a big major problem: the IT Admins cannot create a password policy to define a security standard.
The solution? Deploy Azure AD Password Protection and in this article we will see how to configure the service.
What is Azure AD Password Protection
By default, Azure AD includes a global banned password list. The contents of the global banned password list isn’t based on any external data source. Instead, the global banned password list is based on the ongoing results of Azure AD security telemetry and analysis. When a user or administrator tries to change or reset their credentials, the desired password is checked against the list of banned passwords. The password change request fails if there’s a match in the global banned password list. You can’t edit this default global banned password list.
Azure AD Password Protection give you flexibility in what passwords are allowed, you can also define a custom banned password list. The custom banned password list works alongside the global banned password list to enforce strong passwords in your organization. Organizational-specific terms can be added to the custom banned password list, such as the following examples:
- Brand names
- Product names
- Locations
- Company-specific internal terms
- Abbreviations that have specific company meaning
- Months and weekdays with your company’s local languages
In other words, you can create your password security model also for cloud but also for on-premises.
Deploy & Configuration

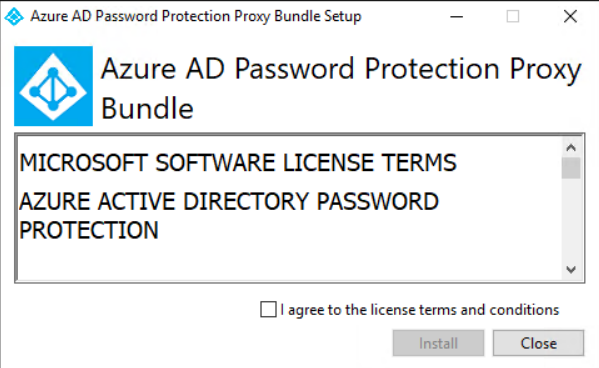
As you can see from the image, there are two components: Agent and Proxy. The first one must be installed in each domain controller of your infrastructure and the second one should be installed in another machine (two if you want create HA).
About DC, these are the pre-requirements:
- Windows Server 2012 R2 or above
- All machines, including domain controllers, that have Azure AD Password Protection components installed must have the Universal C Runtime installed
- You can get the runtime by making sure you have all updates from Windows Update. Or you can get it in an OS-specific update package. For more information, see Update for Universal C Runtime in Windows
- You need an account that has Active Directory domain administrator privileges in the forest root domain to register the Windows Server Active Directory forest with Azure AD
- The Key Distribution Service must be enabled on all domain controllers in the domain that run Windows Server 2012 and later versions. By default, this service is enabled via manual trigger start
- Network connectivity must exist between at least one domain controller in each domain and at least one server that hosts the proxy service for Azure AD Password Protection. This connectivity must allow the domain controller to access RPC endpoint mapper port 135 and the RPC server port on the proxy service
- By default, the RPC server port is a dynamic RPC port from the range (49152 – 65535), but it can be configured to use a static port
Install the Proxy as first step and later the Agent on DC – remember that agent requires reboot unless you add the /norestart flag.
When the Proxy is installed, open a new PowerShell session and run these cmdlets, to register the on-premises Active Directory infrastructure:
Import-Module AzureADPasswordProtection
Register-AzureADPasswordProtectionProxy -AccountUpn ‘yourglobaladmin@yourtenant.onmicrosoft.com’
Register-AzureADPasswordProtectionForest -AccountUpn ‘yourglobaladmin@yourtenant.onmicrosoft.com’

Custom Words
It’s time to define your black list and this is possible from Azure AD portal. The service is available only if you have Azure AD Plan 1 or Plan 2.
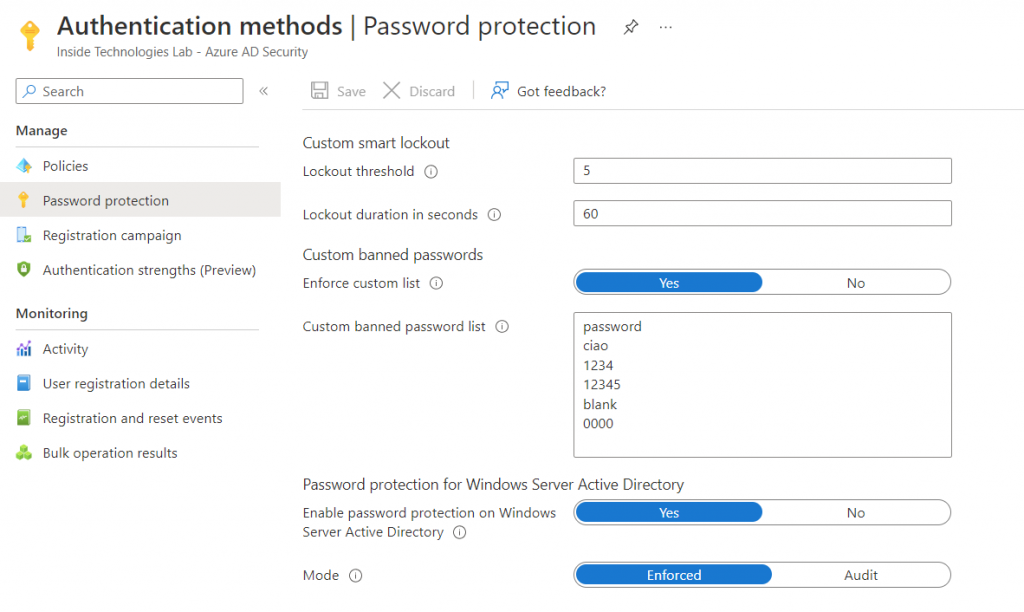
To get started, add your custom banned password list, enable the integration with local Active Directory and enable the Enforce of protection.
The Protection
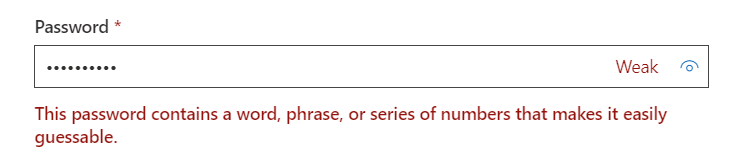
What happen if a user try to use one of the password into the list? From Microsoft 365 portal, in case you have full cloud infrastructure or hybrid cloud – with Self-Service Password Reset – the result will be like this
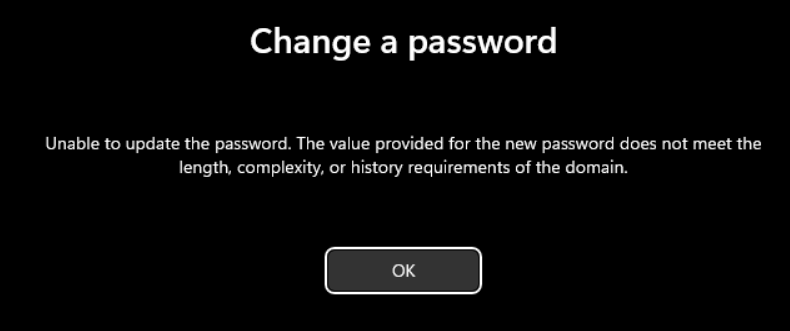
From local, the result is different. Keep in mind that the protection works only when there’s the password reset from computer not from Active Directory Users & Computer snap-in.
The monitoring of password status can be done from Proxy machine with this PowerShell cmdlet: Get-AzureADPasswordProtectionSummaryReport -DomainController yourDC
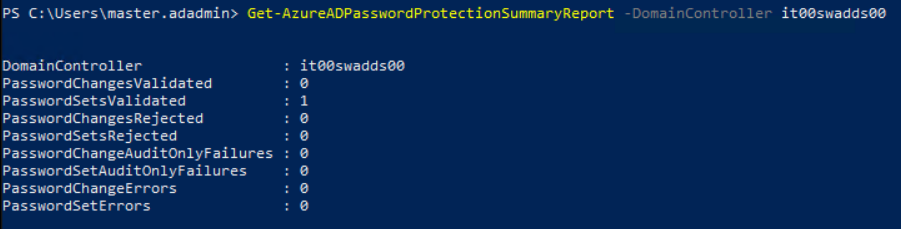
The command must be run for each Domain Controller. The entire event ID lists can be found in this article – Monitor on-premises Azure AD Password Protection – Microsoft Entra | Microsoft Learn
Conclusion
Azure AD Password Protection is a great tool to increase password security in your hybrid infrastructure. With few simple steps, everyone can use the powerful of the cloud to avoid breach and unwanted risks. More information about the solution are available in this article – Deploy on-premises Azure AD Password Protection – Microsoft Entra | Microsoft Learn.
#DBS