In System Center 2012 Virtual Machine Manager we can deploy a Web Application inside a Service Template. This means create a new Web Server front-end machine and install the web site without external action.
But how I can create the right package from IIS? First of all remember that VMM uses Web Deploy for extract the .zip file and for configure the WebApp so you must install Web Deploy inside the source machine where is located IIS; a great tool for this kind of activities is Web Platform Installer: WPI is perfect to install IIS tools because is dependencies-aware so if you want install WordPress he checks before if you have already MySQL and if is not present, adds the bit to make the right installation.
From the source IIS install Web Deploy, as showed in figure 1.
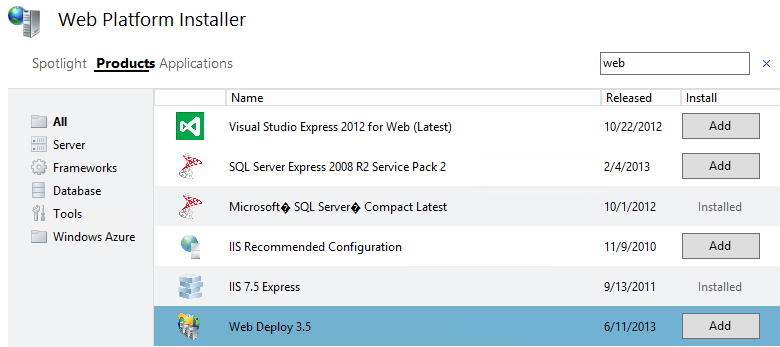
Figure 1 – Web Deploy Install with WPI
Open IIS console and choose which site you want export, right click, Deploy -> Export Application, as showed in figure 2.
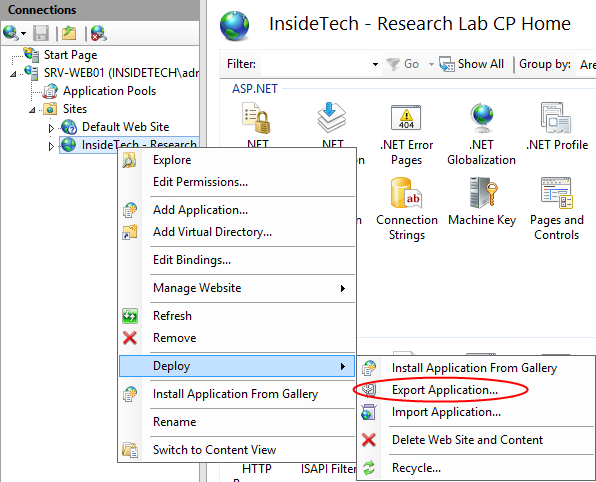
Figure 2 – Export Application
The standard configuration is not right, instead if you try to export this solution, when you try to deploy it from VMM you will receive this message, as showed in figure 3.

Figure 3 – VMM Message Error
Application C:\ProgramData\VirtualMachineManagerData\CacheResources\f8e42999c01c46e0887c90af524c13c1\InsideTech – Research Lab CP.zip, WebDeploy, installation failed on the virtual machine VM-RL-WEB01. DetailedErrorMessage: File system path ‘InsideTech – Research Lab CP’ is not valid. Only absolute paths are supported.. See the event log file C:\Program Files\Microsoft System Center 2012 R2\Virtual Machine Manager Guest Agent R2\bin\Diagnostics\VmmGuestLog.svclog on the virtual machine for more details.
The final test is import the .zip file into another IIS but the message error is similar like figure 4.
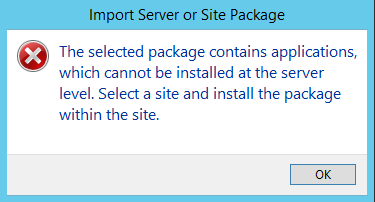
Figure 4 – IIS Message Error
So the question is: what is the right procedure to export a web site with Web Deploy? Inside the Export form, click on Manage Components, as showed in figure 5, and change iisApp with AppHostConfig; if you have a dedicated Application Pool, remember to insert also the AppPoolConfig value with the right name of AP.
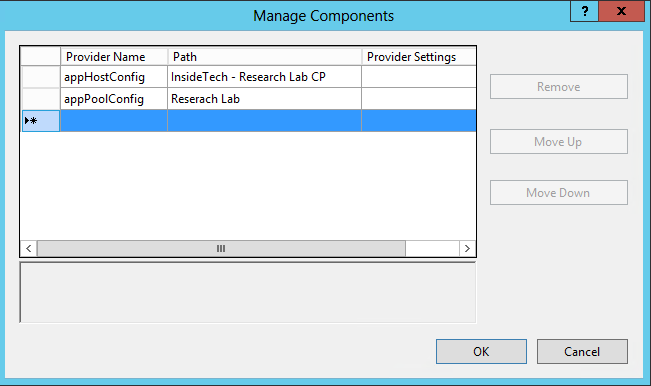
Figure 5 – Manage Components
Important: when you insert a dedicated Application Pool, the wizard will ask you a password to encrypt the file. This is for your security.
Save the file on the SCVMM Library and move on VMM Console. Refresh the library and check if the new file is present, right click on it and open the proprieties. In the field Password, write the same value that you have selected during the export wizard, as showed in figure 6.
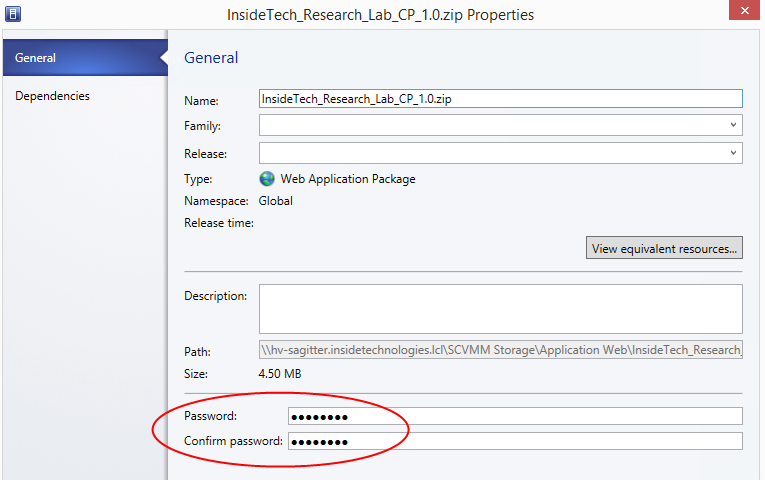
Figure 6 – Zip File Proprieties
It’s time to create the new Application Profile from Library Pane. Insert the name and add a new WebApp Profile, as showed in figure 7, where you must select the zip file with the browse button. By default the destination computer must will have Web Deploy, so you need to install it during the deployment wizard. To do this, insert a new script task under WebApp, select the WebDeploy_x64_en-US_3.1237.1762.cr (or the last version) from library and insert the value as showed in figure 8.
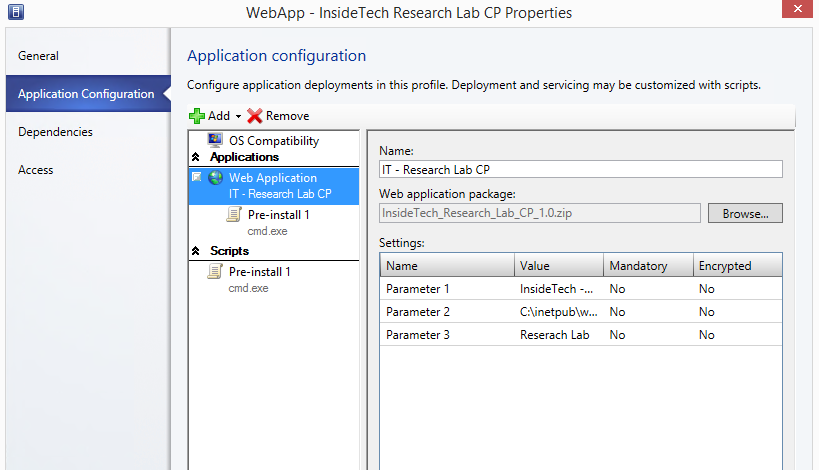
Figure 7 – New WebApp Profile
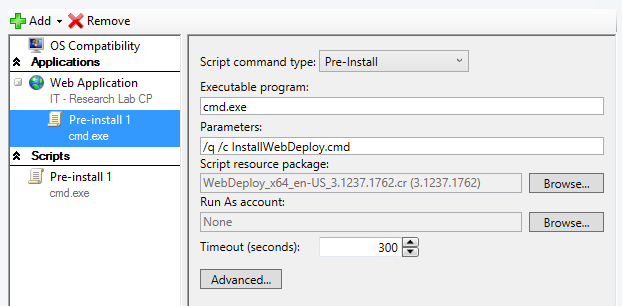
Figure 8 – Script Task
As you can see, the script will be run as the first one. Very cool! Now the problem is another one: if you have a dedicated Application Pool, maybe you have also a Windows User Account dedicated, so you must add this account before the deployment. This can be resolved with another script task but this time will be global Pre-Install script.
Before this step it’s necessary create a new folder under the SCVMM Library called MyCustomTask.cr; the name is customizable but remember to insert also the suffix .cr! Inside this folder insert a file called for example DeployUserAP.cmd where will be write this command: net user myaccount password /add
Important: change the username and the password with the exactly credential used into IIS! It’s important also refresh the SCVMM Library from Console.
Now you can insert the Pre-Install script into Web Application Profile, as showed in figure 9.
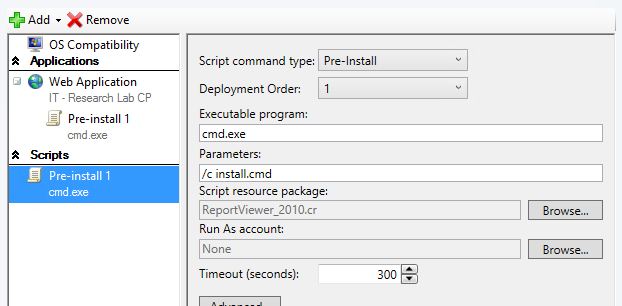
Figure 9 – Global Script Task
Finish! You can add this profile inside Service Template and try to deploy it. If you have follow all the step, the wizard will be works fine. Take care to create also a GuestOS Profile with the IIS Roles because Web Deploy require these components to works!
S