One of the new feature in Microsoft Azure is Automation. The idea is automate some tasks without do anything “manually” for example it’s possible start a virtual machine in the morning and stop it in the evening (to reduce the costs).
This is article will explain how to create the first Runbook on Azure.
First of all take the Azure Subscription ID and the Subscription Name and this is possible from the classic portal or from the new Azure Portal (portal.azure.com), as showed in figure 1.
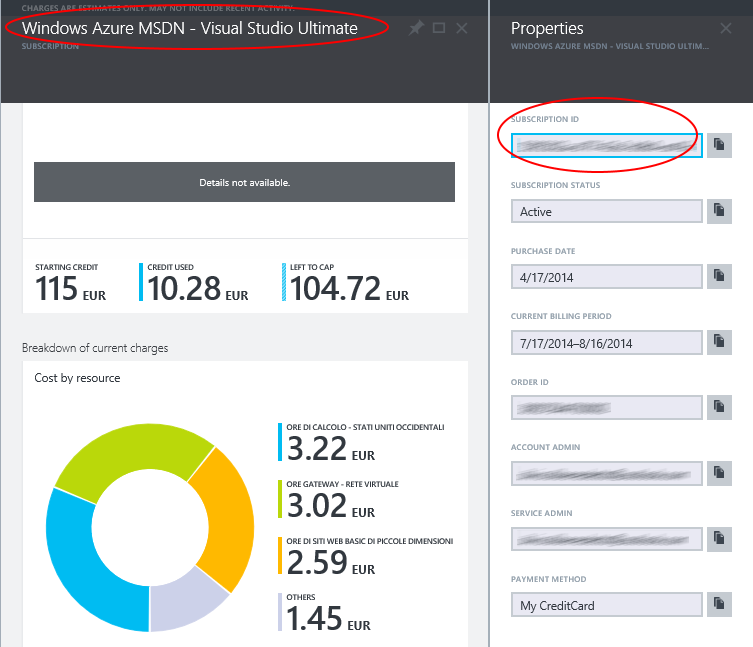
Figure 1 – New Azure Portal
The second step is generate a certificate from your computer with makecert. This is a requirement to authenticate some operations and to create a relationship between the Runbooks and your Subscription. This is the command:
makecert -sky exchange -r -n “CN=Automation-Azure” -pe -a sha1 -len 2048 -ss My “c:\Automation-Azure.cer”
Open the MMC/Certificate and export the certificate in .pfx and .cer format. From the Azure Portal, open the Settings section and import the .cer certificate, as showed in figure 2.
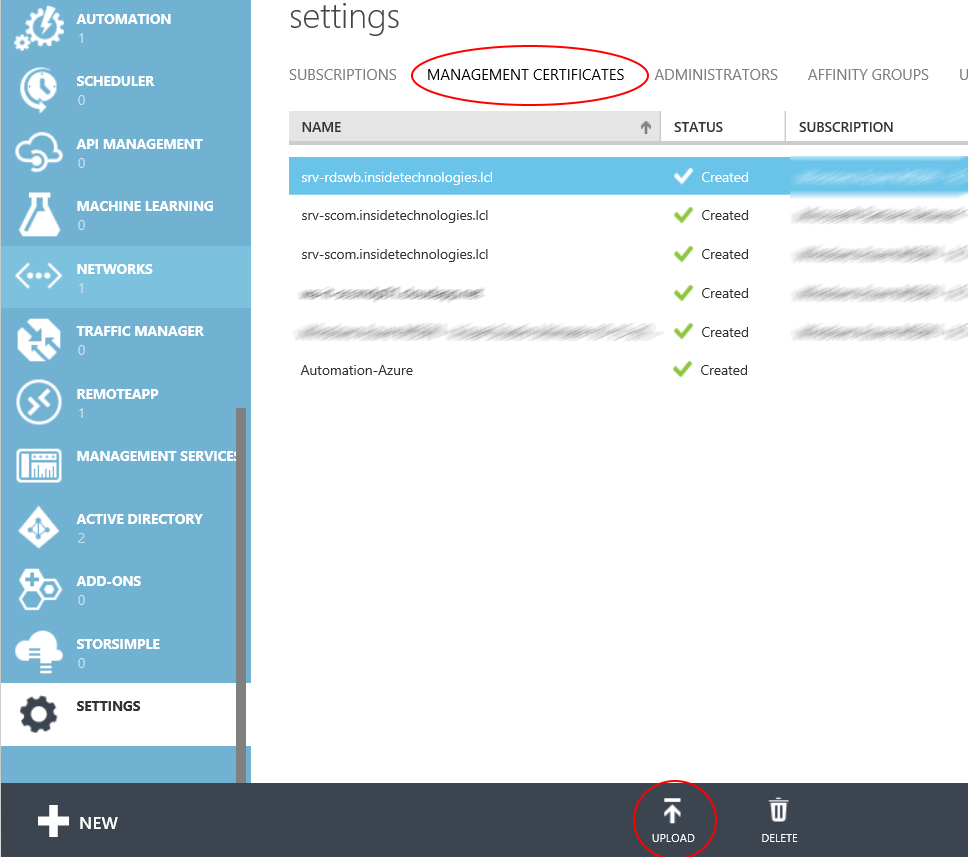
Figure 2 – Import .cer
It’s time to jump to the Automation section, but if you don’t have already this feature, follow these step:
- Log on your Microsoft Azure Account
- Open the Preview Page (https://account.windowsazure.com/PreviewFeatures)
- Request the Windows Azure Automation Feature
After that the feature will be enabled, create a new Automation Container, from the Azure Portal Site.
Next step is import a new Runbook into the container. The format must be .ps1. For this example we will create a script to start a virtual machine on Azure (just to be clear, the VM must be already present). The examples can be downloaded from the Download Page. Import the file called VM_Start.ps1 into Azure Automation.
In order to avoid the re-insert every time of some values, like Subscription ID or Subscription Name, we can create a global variable, called Asset. The figures 3 and 4 show steps to add a new value.

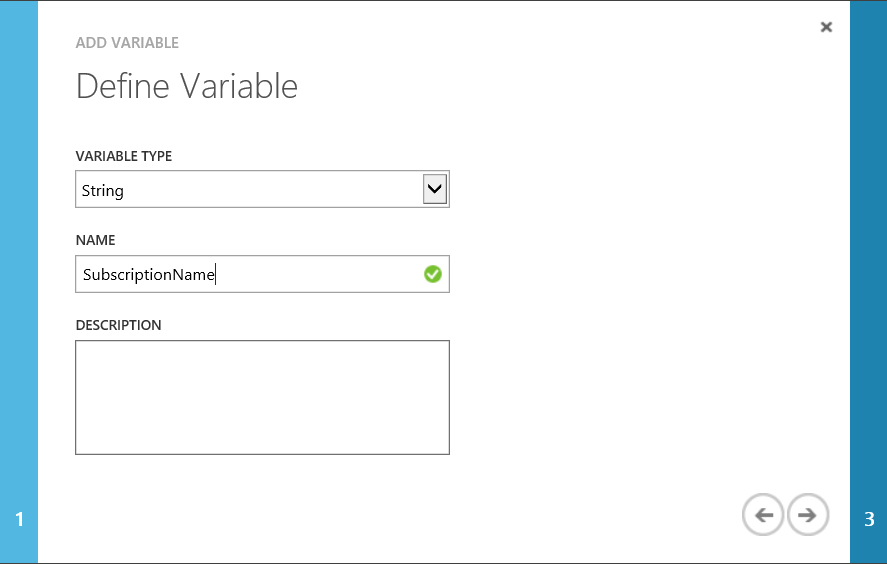
Figure 3,4 – Add Settings
For this exercise we need these variables:
- Azure_Certificate – Type Certificate – Import the .pfx certificate that you have exported previously
- SubscriptionID – Type String – Insert your Azure Subscription ID
- SubscriptionName – Type String – Insert your Azure Subscription Name
- SubscriptionCertificate – Type String – Insert the value Azure_Certificate
At the end of these steps the result should be like figure 5.
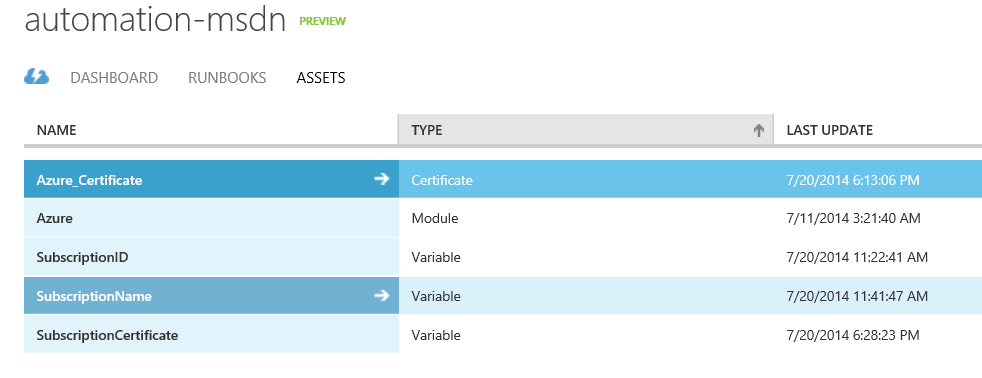
Figure 5 – Asset List
It’s time to test our Runbook and to do this you must click on Test – as showed in figure 6. Insert the name of Cloud Service (without suffix .cloudapp.net) and the VM Name and if you have followed the task right, the result will be like figure 7.
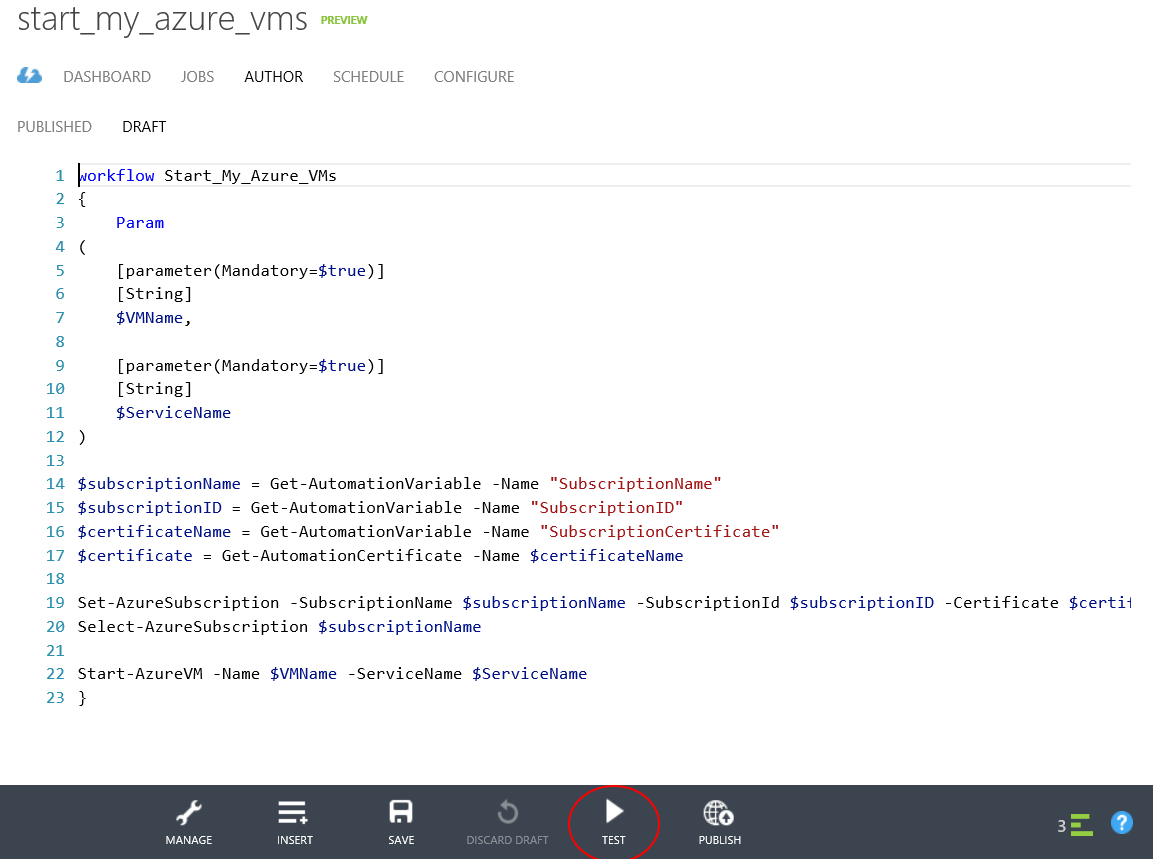
Figure 6 – Test your Runbook
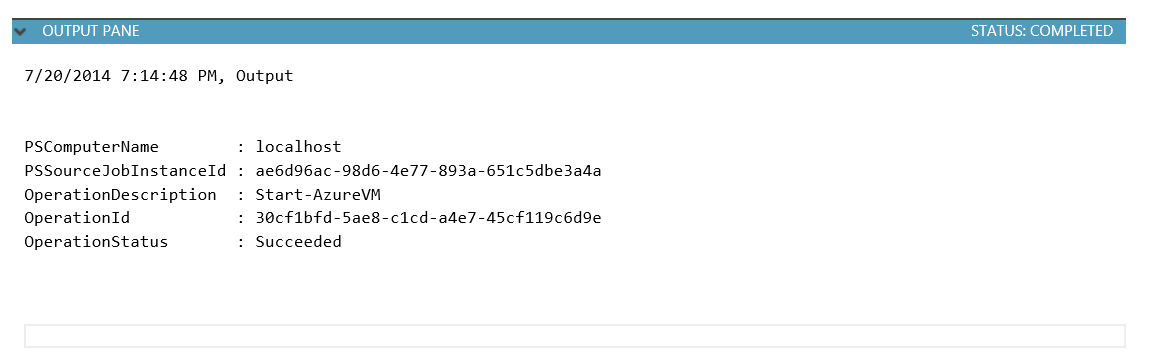
Figure 7 – Task Completed
Go on the Virtual Machine and check if the selected VM is in Starting Mode, waiting few minutes until the logon screen. Go back on Automation section and import the Runbook called VM_Stop.ps1 and test it with the same VM.
Congratulations! You have created two Runbooks to automate the startup and shutdown of your VM on Azure!
S