Questo articolo è disponibile anche in lingua italiana al seguente link: Microsoft Intune: configurare gli Endpoint Privilege Management – WindowServer.it.
Anyone who manages an infrastructure knows that users think they can do anything with their device, including installing any type of software found in the Internet ecosystem.
To deal with this, the mandatory rule is to make users as Standard Users, so as to prevent any type of setup; however this type of operation is no longer sufficient because there are several applications, such as Chrome, Firefox and WhatsApp, which are also installed in the user profile, without requiring any type of authorization.
To deal with this risk, it is possible to use AppLocker which since March 2023 has also been made available within the Windows Pro SKU (before it was only present in the Enterprise).
Closing everything is fine, but there are scenarios where the software needs to run in an administrative context just to be able to update plugins or to reactivate the product key. This automatically spills over to the IT department which can be overwhelmed with requests for support from users.
To overcome the problem there are several third-party software that allow you to manage the granularity of permissions; among these we also find the new Endpoint Privilege Management, a solution present natively in Microsoft Intune, which allows users of your organization to run applications with elevated privileges, despite being users without administrator rights.
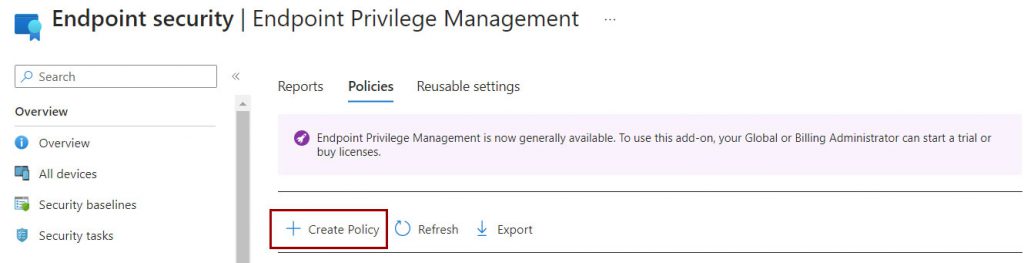
Endpoint Privilege Management
Endpoint Privilege Management requires a Microsoft Intune Standalone add-ons license or the Microsoft Intune Suite, so it is not automatically included in any plan on the market today.
What versions of Windows are supported?
- Windows 11, version 22H2 (22621.1344 or later) with KB5022913
- Windows 11, version 21H2 (22000.1761 or later) with KB5023774
- Windows 10, version 22H2 (19045.2788 or later) with KB5023773
- Windows 10, version 21H2 (19044.2788 or later) with KB5023773
- Windows 10, version 20H2 (19042.2788 or later) with KB5023773
The configuration is quite simple and is developed in two tasks: preparing the client to activate the elevation of applications and defining which software can be executed in elevated mode.
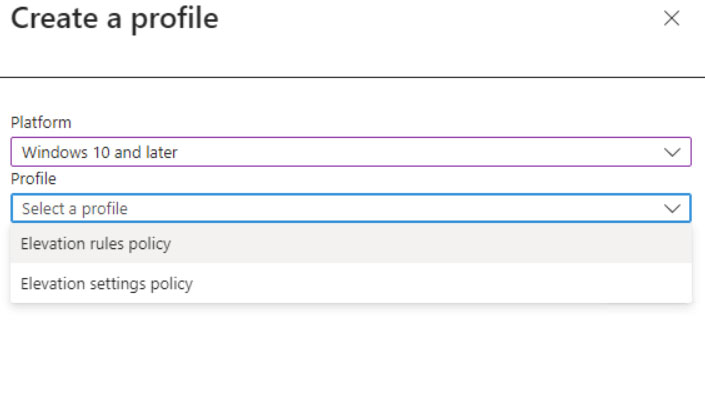
The Elevation Settings Policy allows, as written, to define whether endpoints will be able to elevate software with elevated rights.
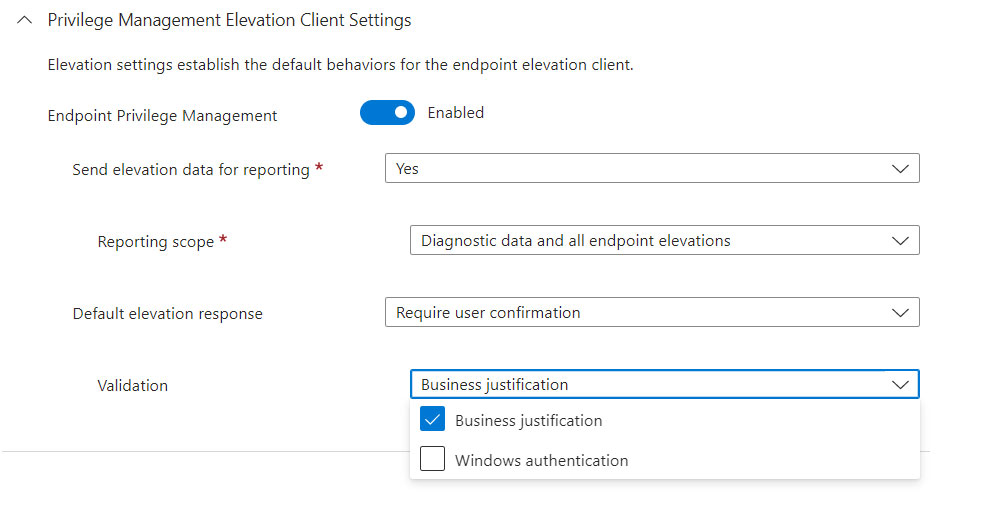
The policy can be “Deny All Request” (or Not Configured) or “Require User Confirmation”, defining which validation mode to enable: Business Justification and/or Windows Authentication (with the credentials of the user making the request).
Note: In the future it will be possible to use the Support Approved option which will allow you to send the execution request directly to the IT department to be enabled to run in elevated mode.
This policy must be distributed for a group of devices/users who will have to take advantage of the functionality. For convenience, one could think of activating it at all, but hardening also passes from here and therefore start by doing the right things right away.
The last step is the creation of the Elevation Rules Policies, i.e. the software that can be run with high privileges.
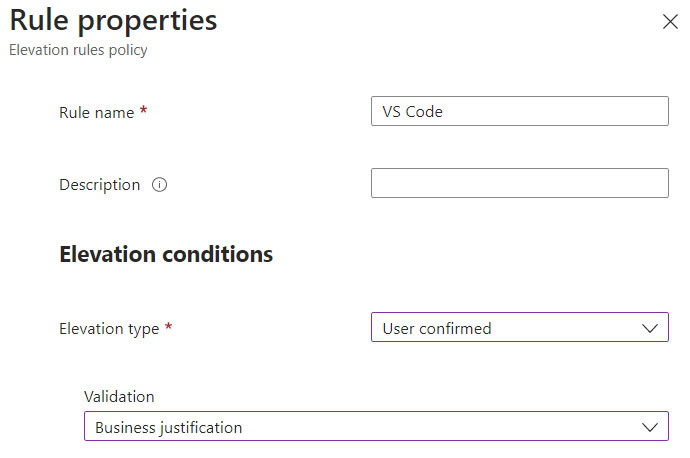
Enter a software name, a row will be created for each application, and choose which type of elevation to apply, between Automatic and User Confirmed (recommended); if the second option has been chosen, the type of validation to be applied must be specified.
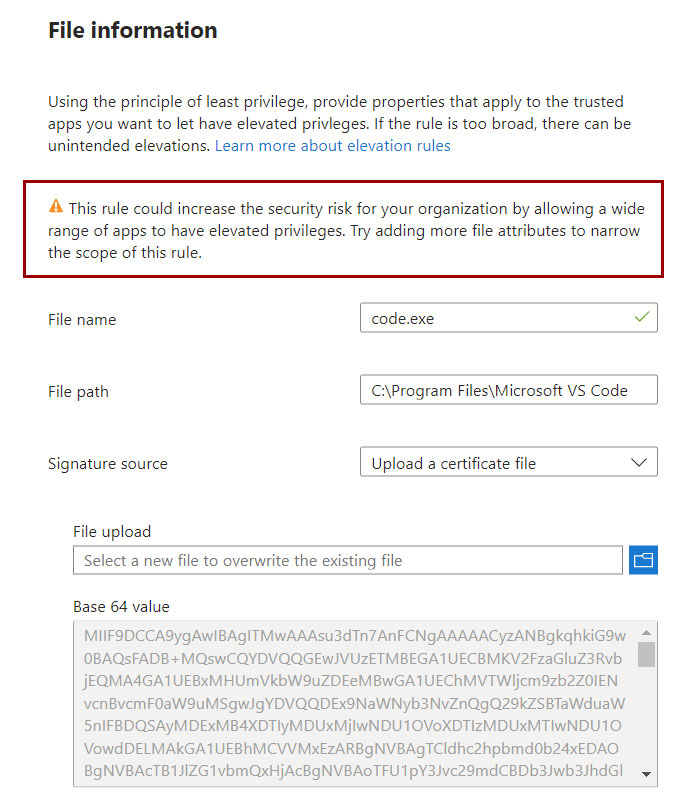
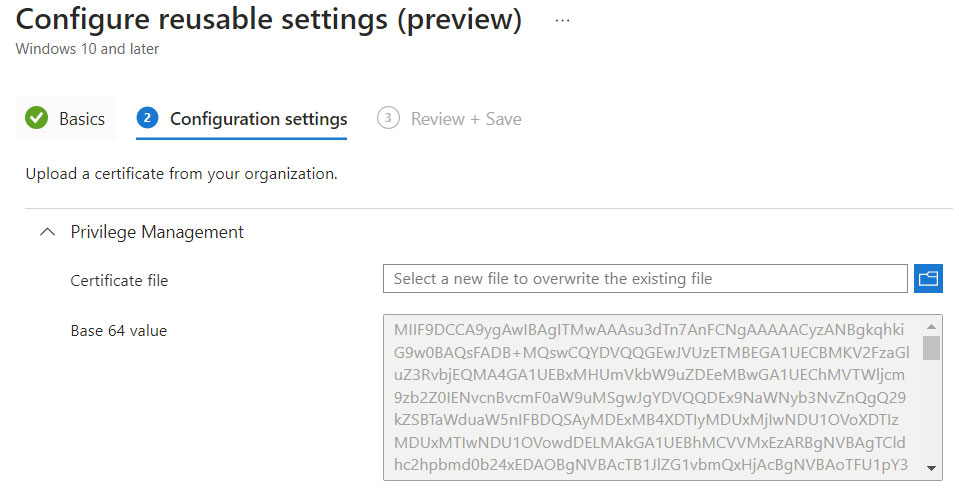
Continuing with the configuration of the rule, you will have to choose how to identify it: this thing can be done through a digital certificate or through its hash.
For those who have used AppLocker, they know that the certificate used to manage the Allow/Deny rules is that of the software manufacturer and this means opening the door to total disaster.
Importing a certificate could mean unintentionally unlocking the use of all applications produced, for example, by Microsoft, including PowerShell; to prevent all this, as it is indicated when importing the certificate, it is necessary to indicate as many fields as possible so that only that software can be executed in an elevated context.
The certificate….but how do you recover it? From PowerShell, with the following cmdlet: Get-AuthenticodeSignature “your exe file path here” | Select-Object -ExpandProperty SignerCertificate | Export-Certificate -Type CERT -FilePath “c:\temp\YourExeFileCert.cer“
This file can be loaded in each single rule, or within the Reusable Settings (which we will deal with later).
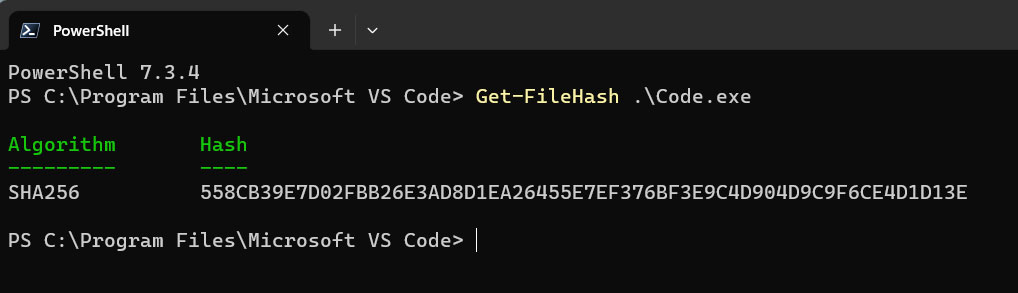
So, to close the mesh of our rule a bit, we can retrive executable hash using the cmdlet: Get-FileHash “your exe here”.
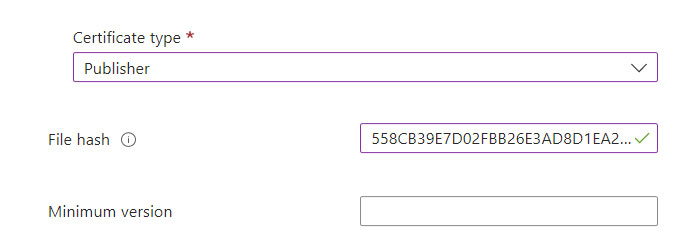
In the certificate type you can choose between Publisher or Certification Authority (which is not your CA); the suggestion is to always use the first option as the CA part is not always able to detect intermediate certificates, blocking the execution of the application. More information can be found at the following link – https://learn.microsoft.com/en-us/mem/intune/protect/epm-deployment-considerations-ki#certificate-rules-defined-as-issuing-certificate-authority- might-not-allow-elevation.
Who do I distribute the rule to? If we have already talked about hardening before, now we have to be even better because rules must be made by department or by type of application which, however, must be distributed to a group of users who really need this function.
User Experience
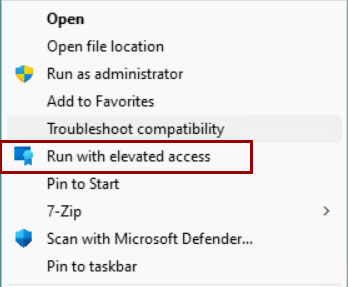
How does it all appear to the user? Quite simply he will have to right click on the program he wants to run with elevated privileges. This procedure is currently not supported in the Start Menu or in the Task Bar.
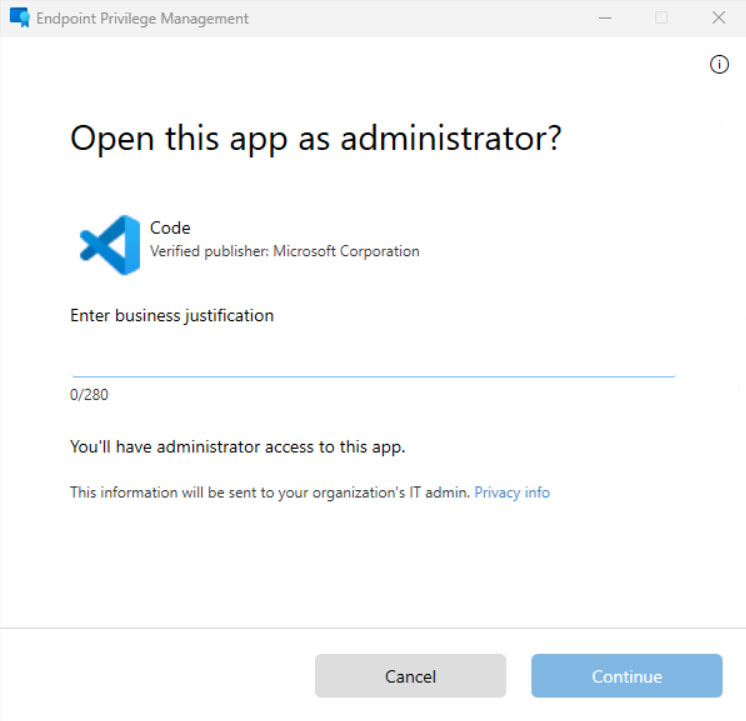
The reason for the Business Justification is given by the fact that you can make reports in order to understand when and by whom the software has been run with administrative privileges (ie auditing).

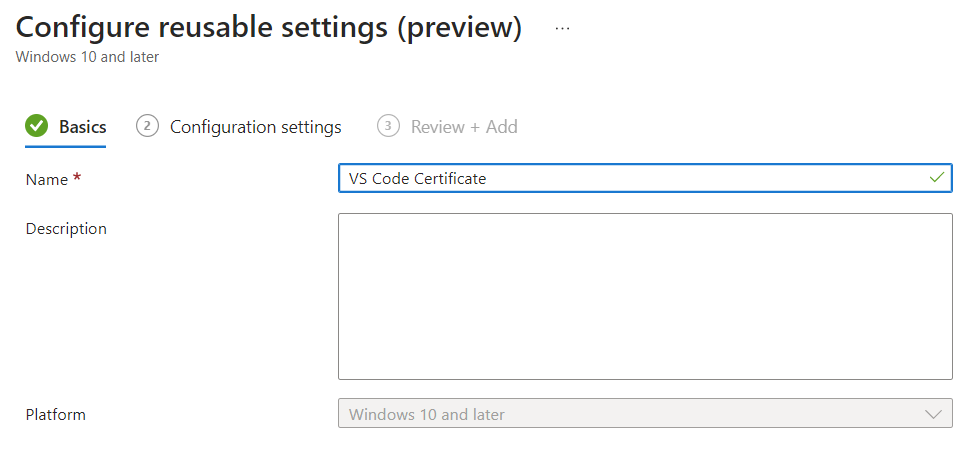
Reusable Settings
If we think about how many products Microsoft has in its catalogue, the idea of having to re-import the digital certificate several times can make us waste a lot of time. As a solution to the problem, we find the Reusable Settings, rules that can be created only once and reused in the various steps … such as digital certificates for example.
Conclusions
Endpoint Privilege Management is certainly a very powerful tool that allows you to offload the IT department by offering a perfect balance between control and security. For more information, you can refer to the official documentation at the following link – Configure policies to manage Endpoint Privilege Management with Microsoft Intune | Microsoft Learn.
#DBS