Questo articolo è disponibile anche in lingua italiana al seguente link: Microsoft Entra: accesso alla rete senza VPN con Private Access - WindowServer.it
One of the oldest yet most resilient technologies, certainly, is VPN. This service has been used for over 20 years to access corporate resources when we are outside its classic perimeter. It’s a tool that has run its course, especially in recent years, as more than valid alternatives have emerged.
For example, when it comes to launching applications remotely, RemoteApp is the most convenient, secure, and fast solution. The same goes for VDI or accessing a Remote PC in the company. From this perspective, we have many alternatives: Microsoft offers its Azure Virtual Desktop service, and we can also use tools like Parallels RAS.
However, one area where VPN still dominates is access to the file server. In this case, VPN usage is almost mandatory, unless you have implemented Azure Stack HCI, which, thanks to Hybrid Benefits, allows you to use SMB Over QUIC. This feature exposes the file server via TLS 1.3 and UDP 443, all without needing any VPN client. You can find more information on this technology in my article - How to configure SMB over QUIC in Windows Server 2022.
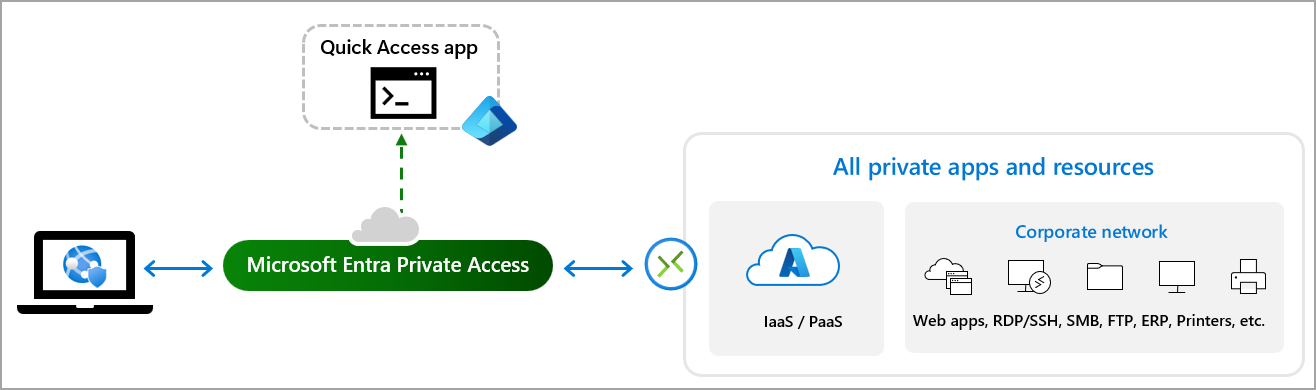
This scenario is perfect for a new solution that Microsoft has developed, called Entra Private Access. It involves opening a constant tunnel with your infrastructure without the use of a VPN.
The idea of an always-open tunnel is not new to Microsoft, which had previously tried it with VPN Always VPN On and earlier with DirectAccess. But in both cases, it’s a true VPN client that remains open all the time or opens as soon as you leave the corporate perimeter. Private Access goes further and works via HTTPS, with a much easier implementation, especially compared to DirectAccess.
Before we see how to set it up, let’s discuss the basics and what’s behind this new service, because, in truth, Microsoft has chosen to reuse something that has been on the market for many years, known as Azure AD Application Proxy. This technology allows you to create a bridge to publish “private” web applications without creating known URLs or firewall rules. Furthermore, Application Proxy supports Conditional Access, which means you can use it to expose “legacy” or non-MFA-native sites.
This agent has been expanded to support new protocols, such as SMB, RDP, SSH, and much more.
Server Configuration
Configuration is done through the Microsoft Entra portal and falls under the Global Secure Access section, currently in Preview. Remember that to use the service, you need a Microsoft Entra ID P1 license.
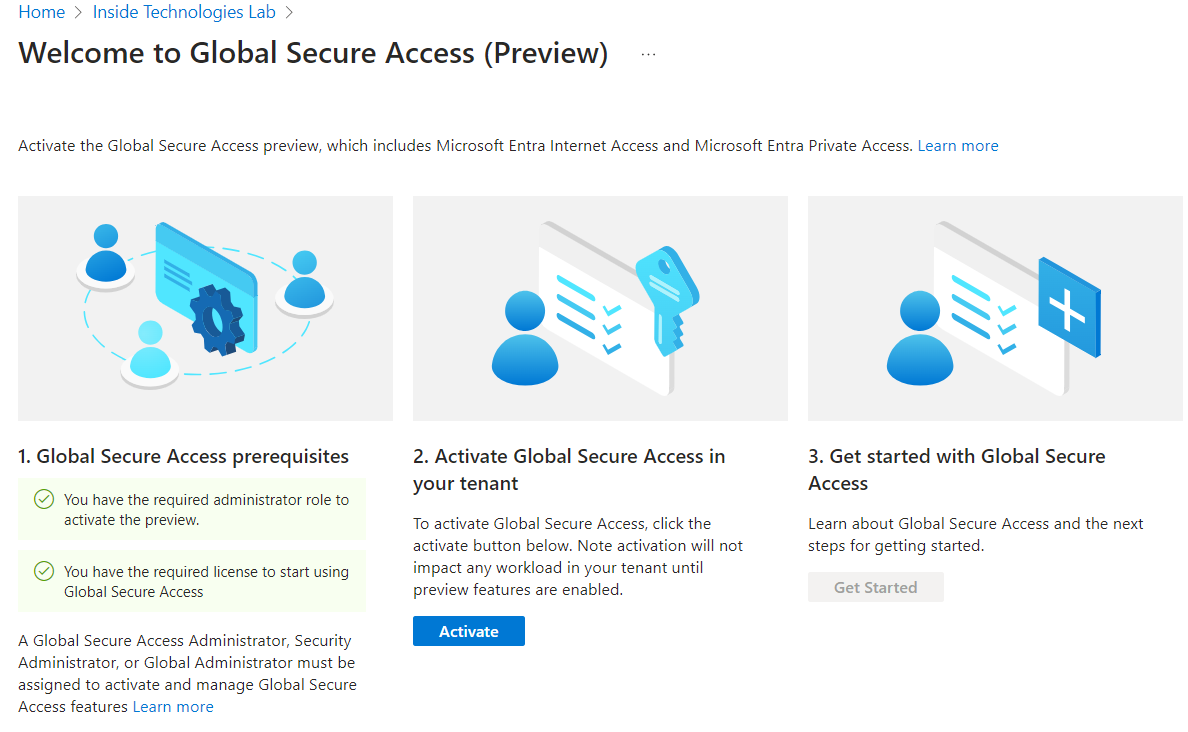
After activating the service for your tenant, you can start the procedure.

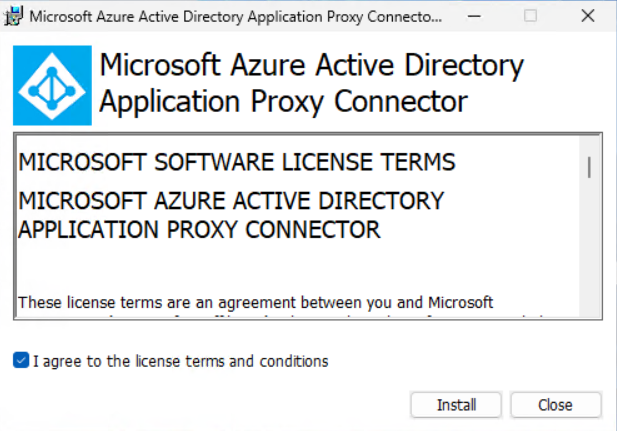
The first step is to install the Application Proxy Connector agent, which should be installed on a dedicated machine and even better on a second server for redundancy.
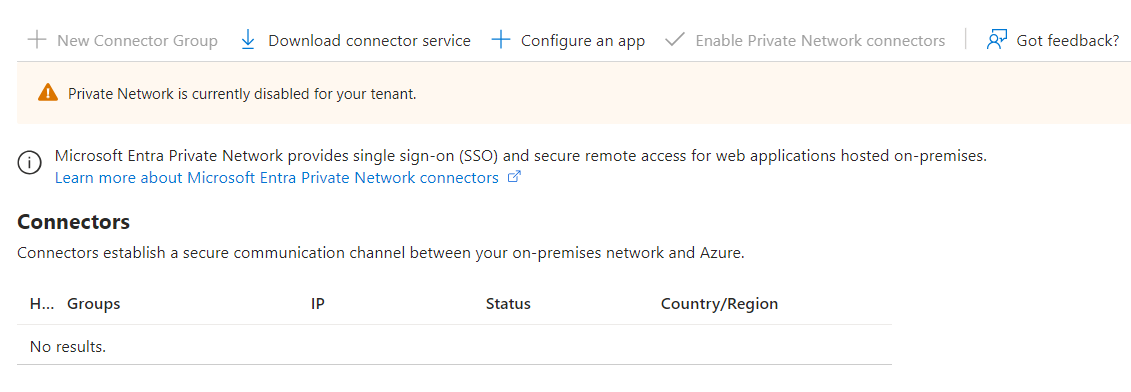
Once the installation is complete, after a few seconds, you can view the enabled connectors.
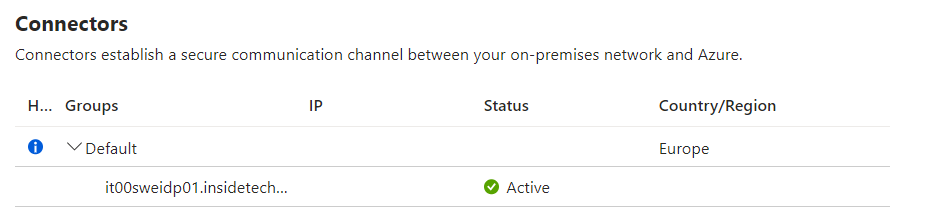
Only at this point will you be able to activate the Private Network to allow the connector to access your local infrastructure resources.

It’s time to create our application, which will provide access to the resources of our infrastructure for authorized users. Within the Applications > Enterprise applications section, you need to create a new App, assigning a name as you like (always try to have a Naming Convention).
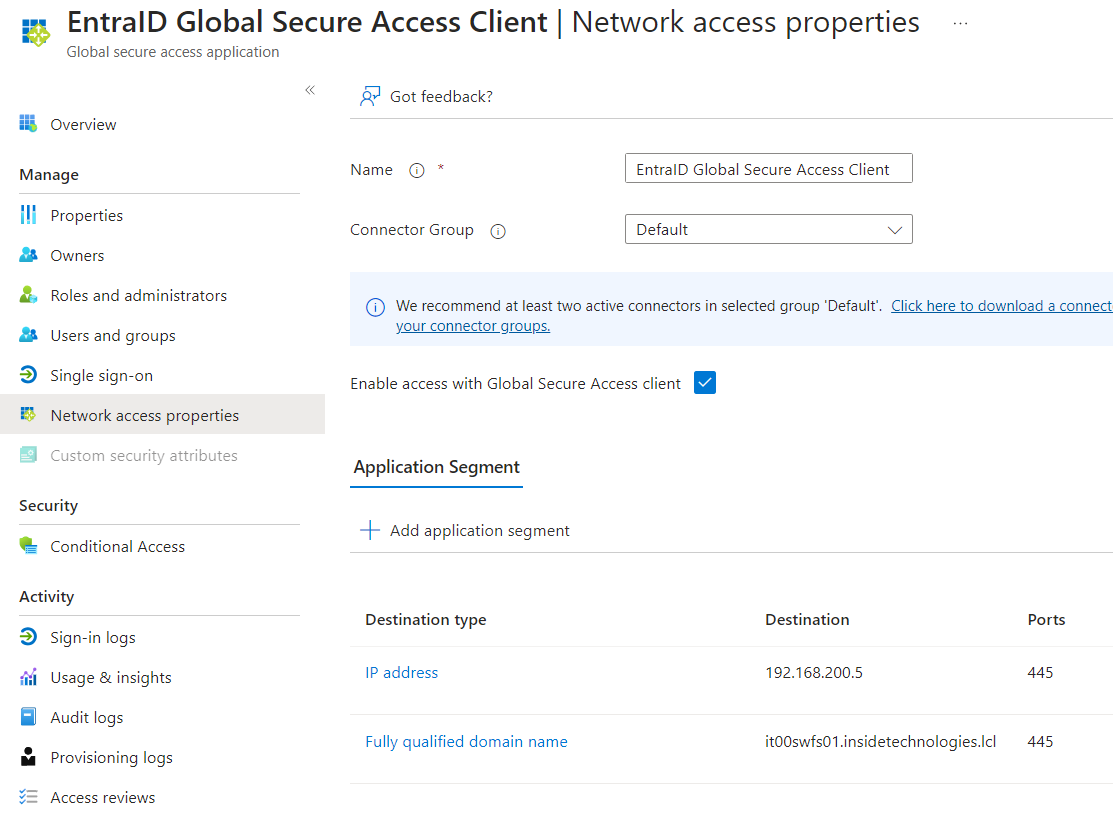
In the Application Segment, you must add the resources you intend to enable for remote access - you can enable individual IPs, ranges, or classes. In the case of enabling access to the file server, it’s advisable to enable the IP in addition to the FQDN. Of course, you can also modify this list later if you want to enable or disable access to certain resources.
There are three tasks to complete before testing in the field. The first is to enable users to access the newly created application in the Users and Groups section of the Enterprise Application.
The second task is to create a Conditional Access Policy to authorize who can use this application and under what criteria.
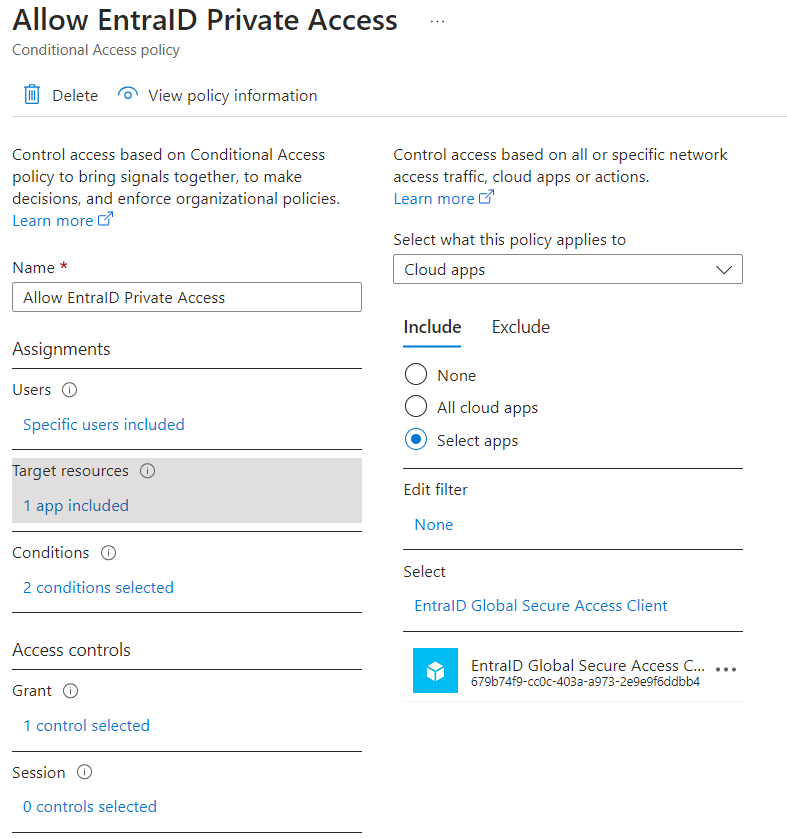
The recommendation is to create a condition valid only for Windows devices marked as Corporate-owned, with the value Grant only if the device is marked as Compliant. This requires the use of Microsoft Intune to validate the compliance of the device trying to connect. If you don’t have it, you can request the use of MFA.
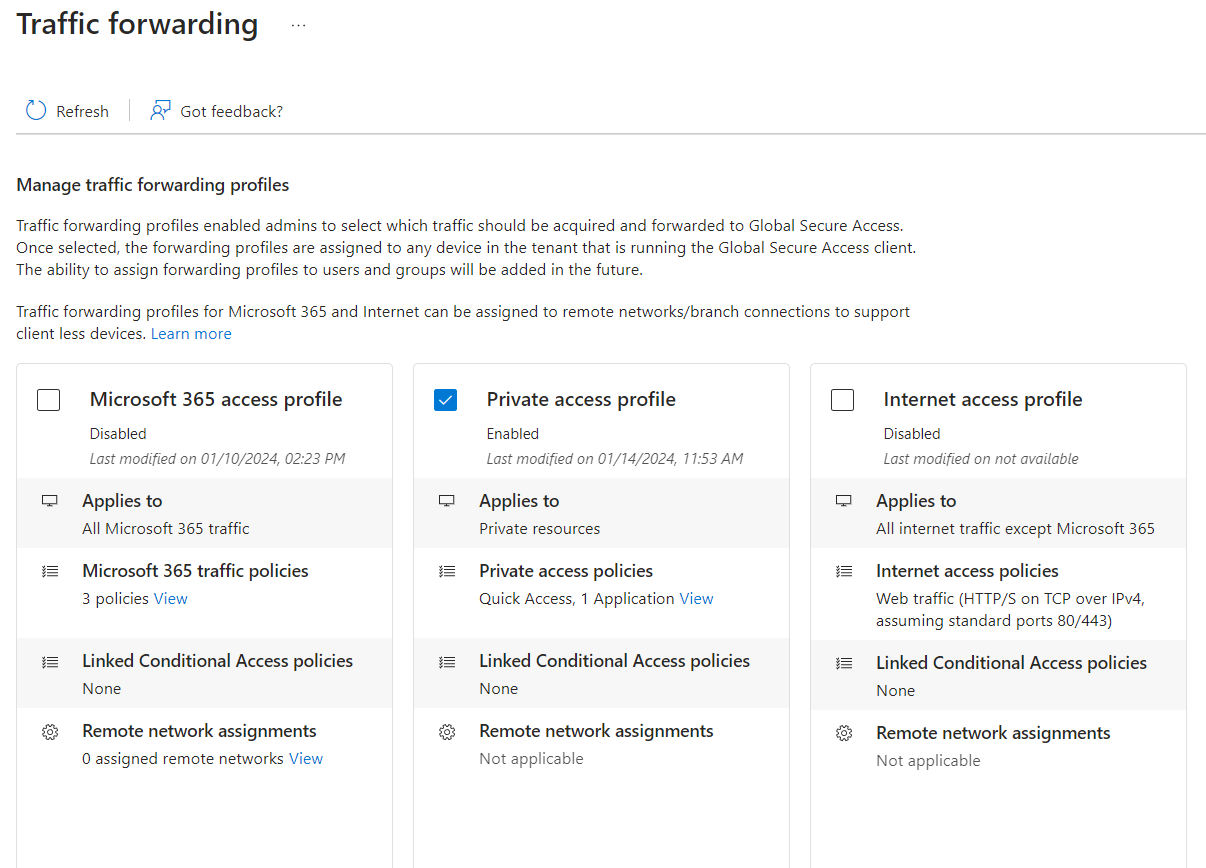
Once you have configured the app, added private resources, and assigned users to the app, you can enable the traffic forwarding profile with Private Access. To do this, go to the Connect > Traffic forwarding section and check the box for Private Access Profile.
Client Configuration
Before starting client-side configuration, it’s worth remembering the following limitations due to the Preview:
- The Global Secure Access Client is supported on 64-bit versions of Windows 11 or Windows 10
- Azure Virtual Desktop single-session is supported
- Azure Virtual Desktop multi-session is not supported
- Windows 365 is supported.
- Devices must be either Microsoft Entra joined or Microsoft Entra hybrid joined
- Microsoft Entra registered devices aren’t supported
- Local administrator credentials are required for installation
- QUIC traffic is not supported
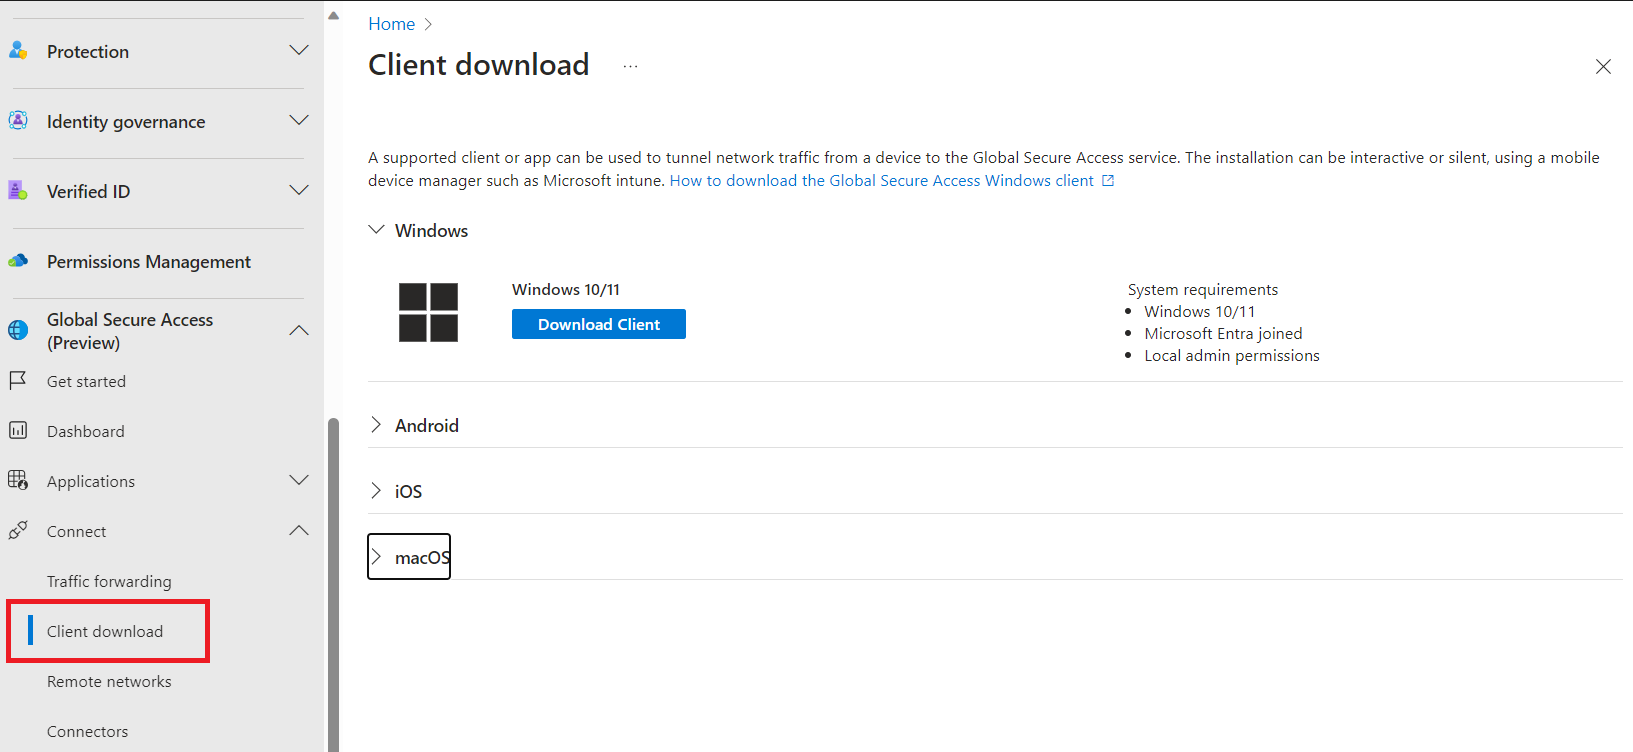
In the Connect > Client download section, you can download the Windows client for Entra Private Access.
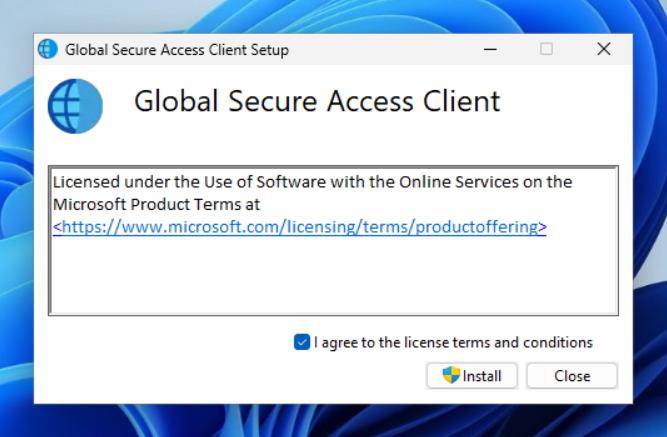
Installation can be done in the traditional way or silently for mass deployment.
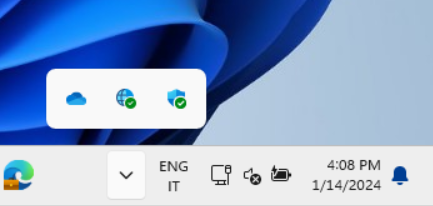
After installation, you can test the client by switching your device’s network from internal to public. The agent operates transparently for users, requiring no additional actions.
Conclusions
Microsoft Entra Private Access is a valuable addition to accessing corporate resources, offering an alternative to traditional VPNs. Microsoft is expected to introduce more features and improvements in the coming months to enhance user and IT admin experiences.