Questo articolo è disponibile anche in lingua italiana al seguente link: Windows Server 2022: come configurare SMB over QUIC - WindowServer.it
Despite the innumerable solutions on the market, from the cloud side, there is an object that will be never killed and this object is called File Server. It is the longest-lived and most crucial service of any company that is used, and abused, by users to save all kinds of objects.
Although the File Server has several limitations, such as the fact that the same file cannot be opened by two users at the same time unlike SharePoint and OneDrive, it still remains a critical element for millions of companies around the world.
In recent years there have been some interesting evolutions, especially with the arrival of version 3.x of the SMB protocol; among all we can think of the integrated encryption between client and server to increase communication security.
As mentioned before, the File Server is a kind of bubble that lives in its infrastructure, which can be extended through the Distributed File Server (DFS) or through Azure File Sync, but which to be enjoyed outside the company always requires the use of a VPN…..this so far.
With the arrival of Windows Server 2022, Microsoft has announced the possibility of using the SMB Over QUIC protocol, which promises to revolutionize the use of the File Server outside the corporate context.
QUIC
Before talking about the operational part, let’s do some theory to explain what it is. QUIC is a protocol invented by Google, to be an alternative for secure communication, for example to TCP, TLS/SSL, and HTTP/2. It offers equivalent protection for data traffic, but in addition has lower connection and transport delays and allows multiplex connections.
The goal of QUIC is to obtain a TCP connection but with reduced latency thanks to two principles:
- Reduce overhead during connection setup by making the exchange of configuration keys and supported protocols part of the initial handshake process
- Using UDP as a basis, however QUIC checks each stream separately and lost data is retransmitted
SMB over QUIC
SMB over QUIC offers an “SMB VPN” for telecommuters, mobile device users, and high security organizations. The server certificate creates a TLS 1.3-encrypted tunnel over the internet-friendly UDP port 443 instead of the legacy TCP port 445. All SMB traffic, including authentication and authorization within the tunnel is never exposed to the underlying network. SMB behaves normally within the QUIC tunnel, meaning the user experience doesn’t change.
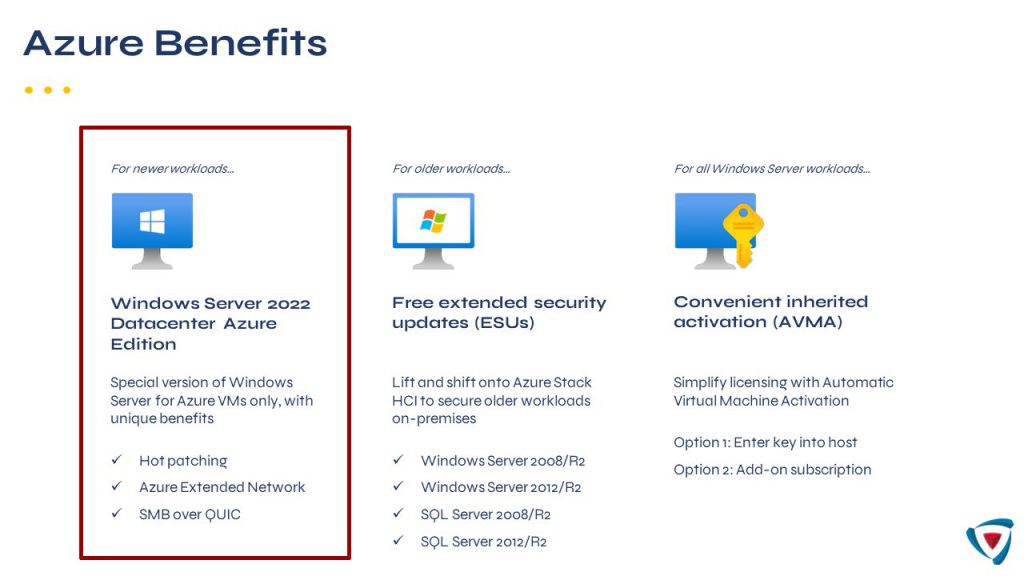
This feature is only present in Windows Server 2022 Datacenter Azure Edition and therefore, as the name suggests, cannot be installed in an on-premises environment…unless you have Azure Stack HCI.
For those who don’t know yet, the use of an infrastructure based on Azure Stack HCI allows you to use some of the assets present only in Microsoft Azure, including SMB over QUIC.
Certificate Configuration
As previously mentioned, the cornerstone of the service is the certificate that is exchanged between server and client, to validate the connection and prevent other users from attacking the infrastructure from the outside. This certificate can be from a public authority, or it can be created within your own Certification Authority. If you decide to purchase a certificate, remember that you cannot use a wildcard but only a SAN or Single-Name.
In this case we will use an internal CA.
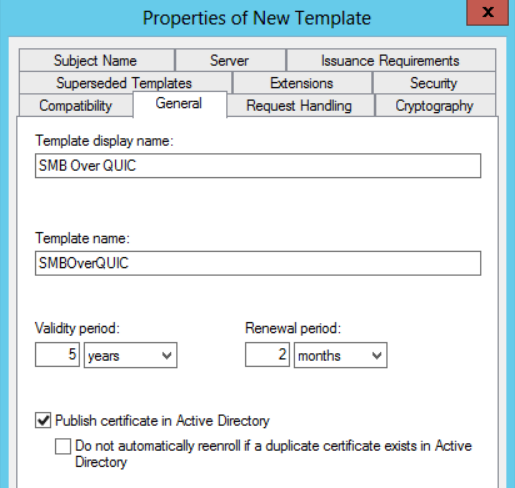
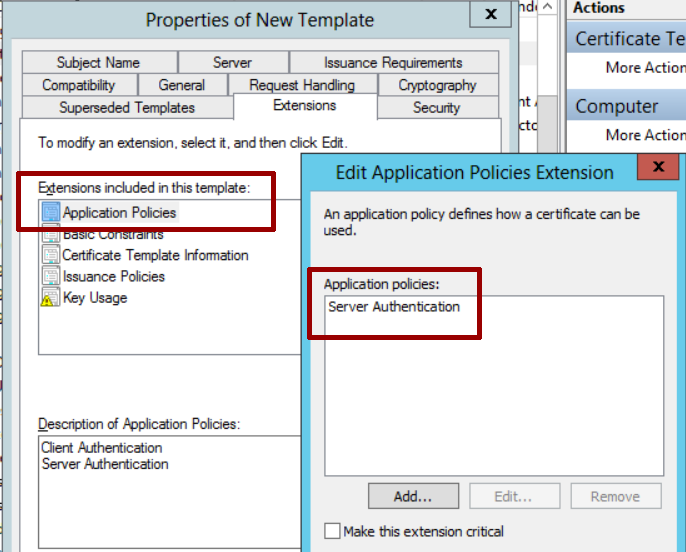
The first step is to duplicate the Computer certificate template, assigning the name you want but trying to give it a Naming Convention. To avoid having to reissue the certificate too many times, choose an expiry of between 3 and 5 years, remembering also to tick the publication in Active Directory checkbox.
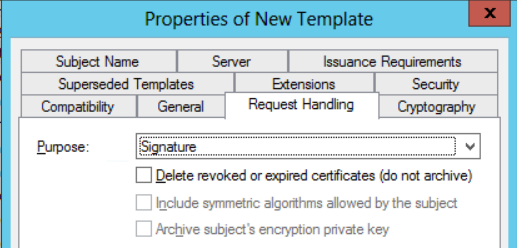
In the Request Handling section select Signature mode.
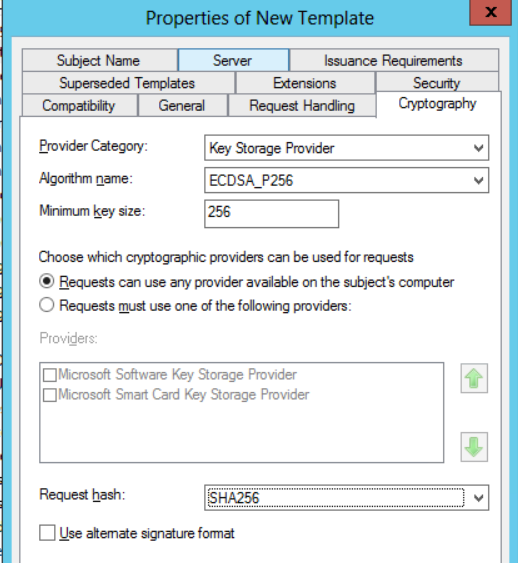
In the Server section select Key_Storage_Provider as Provider, ECDSA_P256 as algorithm and SHA256 as Request Hash.
In the Extensions – Application Policies section leave only Server Authentication.
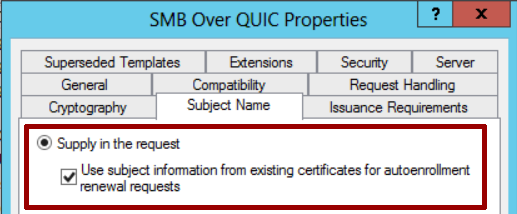
In the Subject Name section select Supply in the request and check the box below.
By default, the certificate can be generated by any Domain Computers, but it’s up to you to choose whether to increase the security level and create a group in which to insert only the File Servers authorized to request.
File Server Configuration
Once the certificate template has been created and placed online, it is necessary to go and create the request within the File Server.
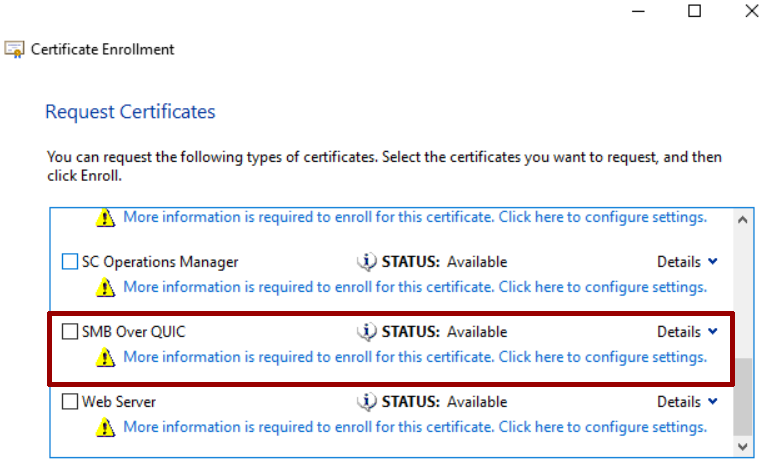
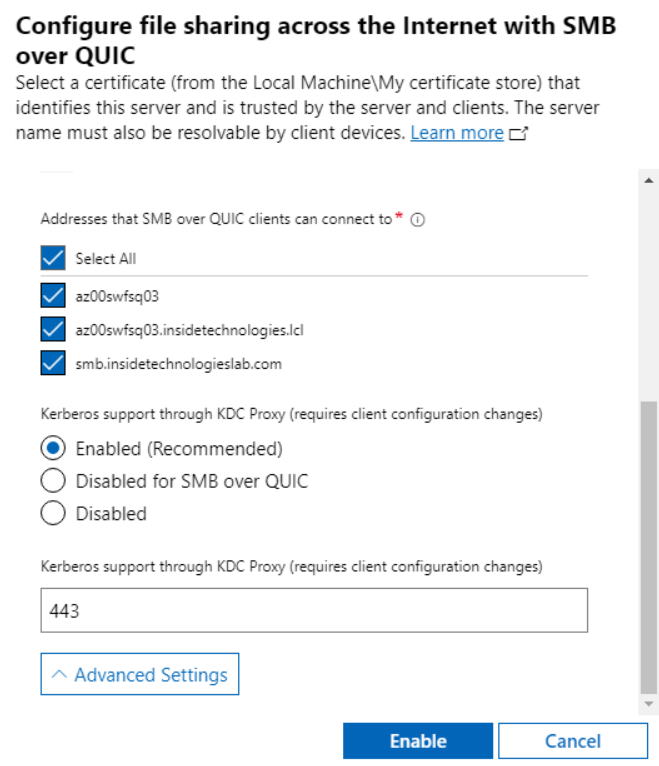
In the CN field you will have to enter the name of your server, while in the SAN you will have to add all the values, including the server name (with and without local domain name) and the public name that you will use outside your organization.

The last step is the configuration of the service which can be done from Windows Admin Center or from PowerShell. In the Files & File Sharing section, you will need to click on the File Server Settings button.
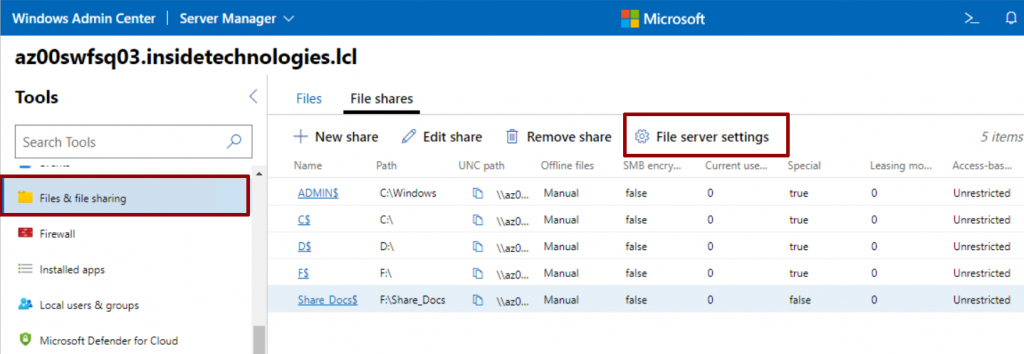
In this section there are several interesting features, such as the use of encryption.
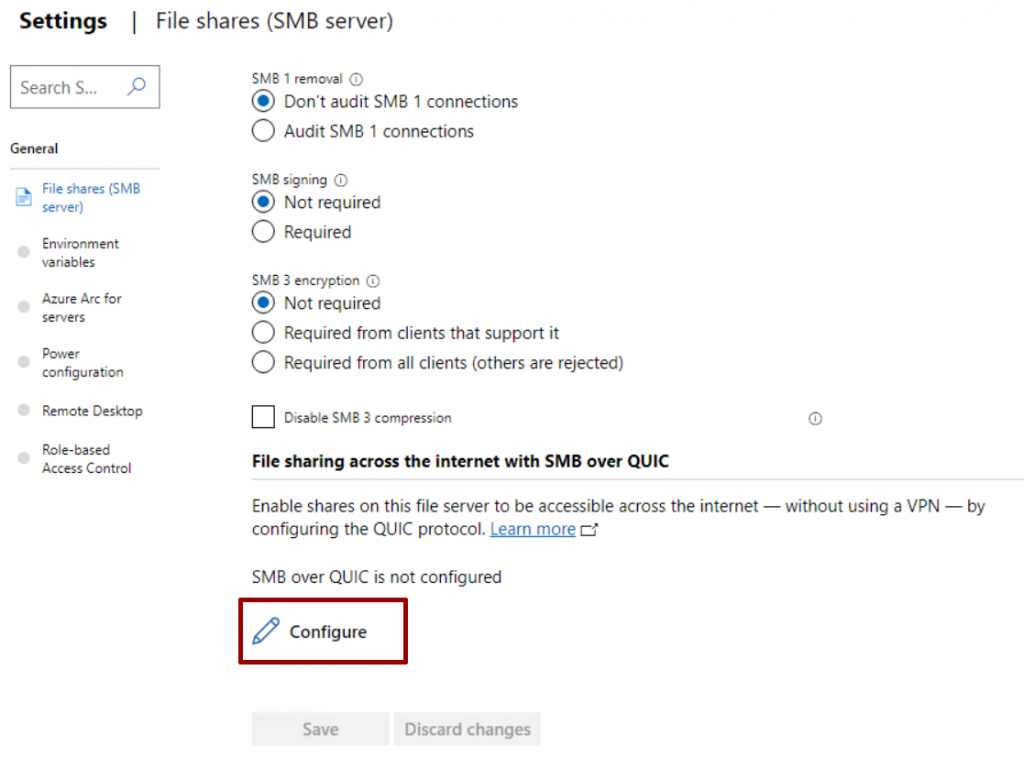
A window will appear in which you will have to select which certificate to use for the connection and which port to use for the Kerberos service via Proxy (KDC Proxy), useful for forwarding ticket requests on behalf of the user.
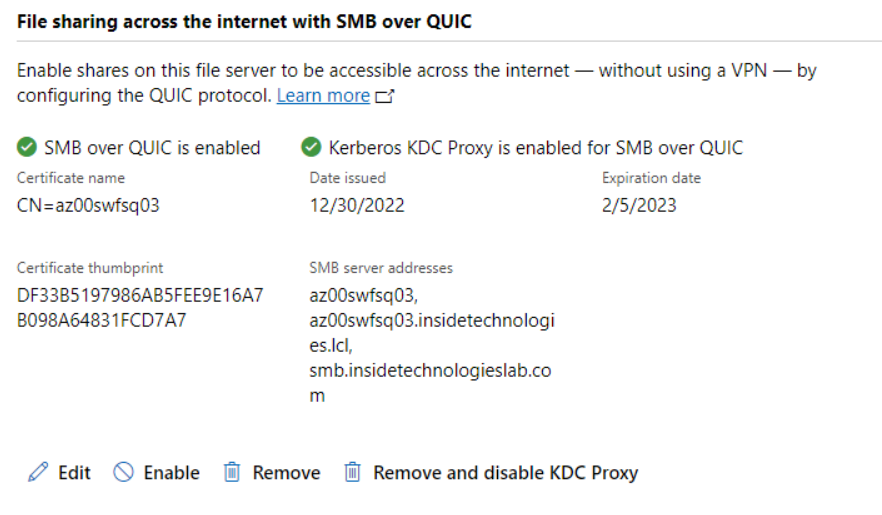
Once the configuration is complete, the service will be usable and marked as ready.
Test Client
Before testing from your client, it is good to remember that the server must be exposed on the Internet, using the DNS record that you have also indicated on the digital certificate. Yes, but with what name should the File Server be published? It is clear that not all companies use the public domain name also for Active Directory (e.g. contoso.com), indeed many companies use a .local domain. This opens the scenario on how to map the disk, because QUIC will also be fast but it will never be as fast as a local network….but we’ll get to that later.
Let’s go back to talking about the client, because an important detail is that only Windows 11 supports QUIC.
The disk map takes place in the classic way but it is possible to force the connection via QUIC, using one of the two options:
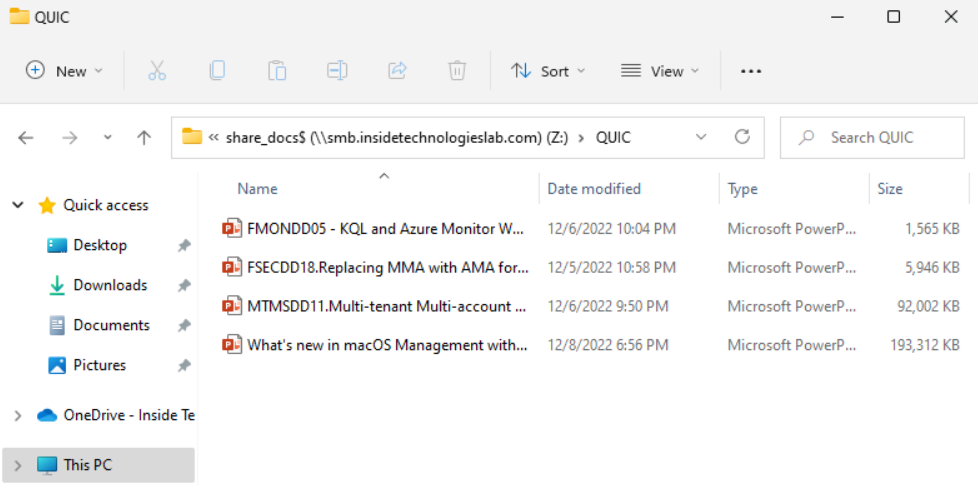
net use * "\\smb.insidetechnologieslab.com\share_docs$" /TRANSPORT:QUIC
New-SmbMapping -LocalPath "Z:" -RemotePath "\\smb.insidetechnologieslab.com\share_docs$" -TransportType QUIC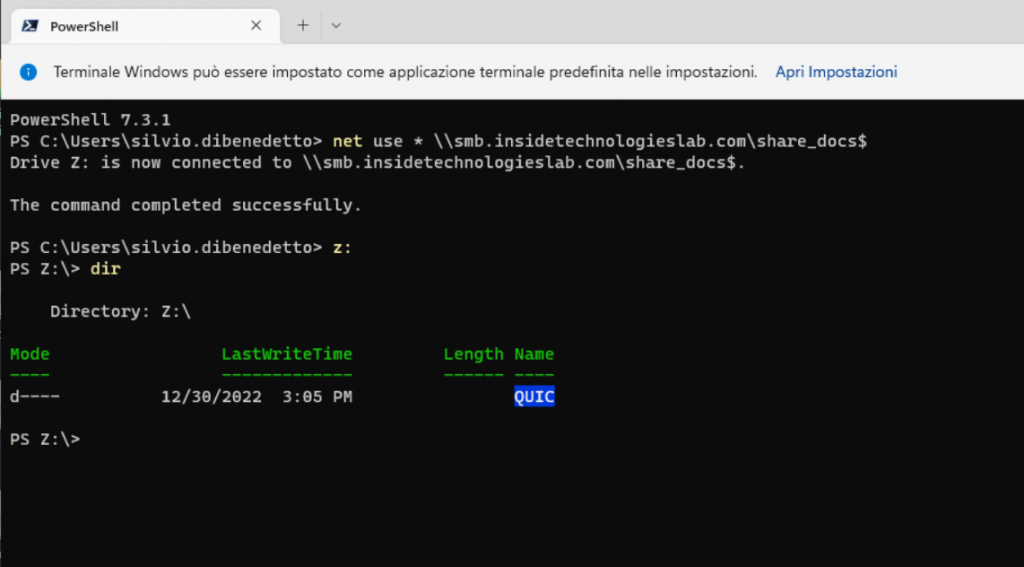
Let’s go back for a moment to our previous dilemma, namely how to manage the connection outside the company. The solution is within Microsoft Intune and is called Proactive Remediations: with this system you can run a script, which perhaps runs every hour, which goes to understand if the computer is still on the local network or not, by changing the path of the share . Here’s a quick example:
$uncServer = "fileserver.contoso.local"
$uncPath = "\\$uncServer\docs"
$ServerPublic = "\\smb.contoso.com\docs"
try {
if ((Test-Path -Path “Z:”) -eq $true) {
net use Z: /delete
}
if ((Test-Path -Path “Z:”) -eq $false) {
$connectTestResult = Test-NetConnection -ComputerName $uncServer
if ($connectTestResult.PingSucceeded) {
net use Z: $uncPath /persistent:no
$drive = New-Object -ComObject shell.application
$drive.NameSpace(“Z:“).self.name = “Docs”
} else {
net use Z: $ServerPublic /persistent:no
$drive = New-Object -ComObject shell.application
$drive.NameSpace(“Z:“).self.name = “Docs QUIC”
}
}
} catch {
$errMsg = $_.Exception.Message
Write-Error $errMsg
exit 1
}
Check File Server
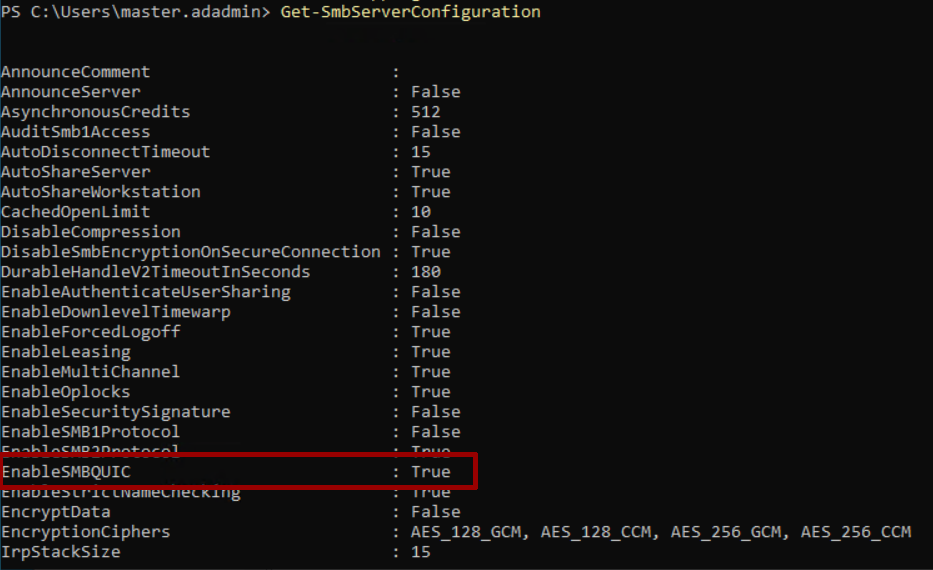
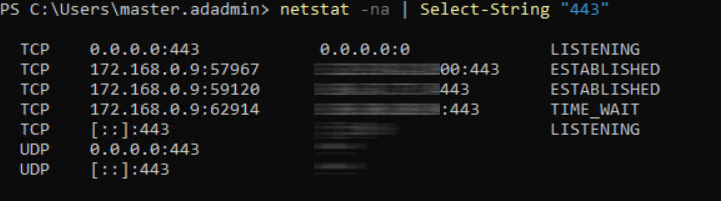
To verify that everything is ok on both the server side, you can run the Get-SmbServerConfiguration by checking the EnableSMBQUIC item, while with netstat -na | Select-String “443” you will see the list of connections in progress.
Conclusion
SMB over QUIC is certainly an excellent solution for securely exposing your File Servers externally, eliminating the use of the VPN. For those who have Azure Stack HCI it becomes even more interesting, because it can also be used within their own infrastructure. More information about the solution are available in this article - SMB su QUIC | Microsoft Learn.
DBS