Questo articolo è disponibile anche in lingua italiana al seguente link: Azure Stack HCI: implementare Azure Virtual Desktop – WindowServer.it
In this previous article we saw how the configuration of the Resource Bridge, within an Azure Stack HCI infrastructure, enables the possibility of using a series of more proprietary tools of Microsoft Azure even in an on-premises scenario.
One of the most interesting, for those who work with Virtual Desktop Infrastructure (VDI) scenarios, is certainly the possibility of implementing an Azure Virtual Desktop farm in their on-premises infrastructure.
AVD allows you to run virtual machines in pooled or personal mode, i.e. with multiple or dedicated access, with Windows Client or Windows Server operating systems, as well as publish applications for your users to use, without having to install them locally on each device.
VDI is a potentially interesting practice but it really depends on the usage scenario. If my idea is not to invest money in devices (desktops / notebooks), I can think of shifting the budget to this solution. The pros are centralization, the possibility of providing the service even outside one’s own territory, optimization of resources and general simplification, but also an increase in security. The cons is given by the fact that outside their own company, users need an endpoint to connect (e.g. a personal laptop or tablet) which they do not necessarily have; in addition, an Internet connection is always required.
So, interesting but, regardless of the vendor used, it must be evaluated carefully.
Azure Stack HCI allows you to create a pool based on Azure Virtual Desktop keeping the front-end and gateway component in the cloud, leaving the virtual machines on-premises, which are the ones that really impact the monthly billing.
Configuration
Before starting the configuration, it is essential that you have already implemented the Resource Bridge which will activate the connection between your Azure Stack HCI environment and Microsoft Azure. Not surprisingly, as soon as this operation is done, you can select the Deploy of the AVD farm.
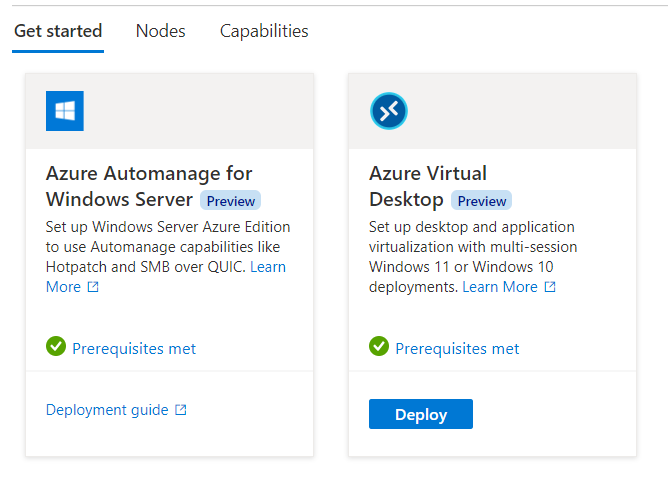
Currently the deployment is based on an ARM template, so there is no guided wizard.
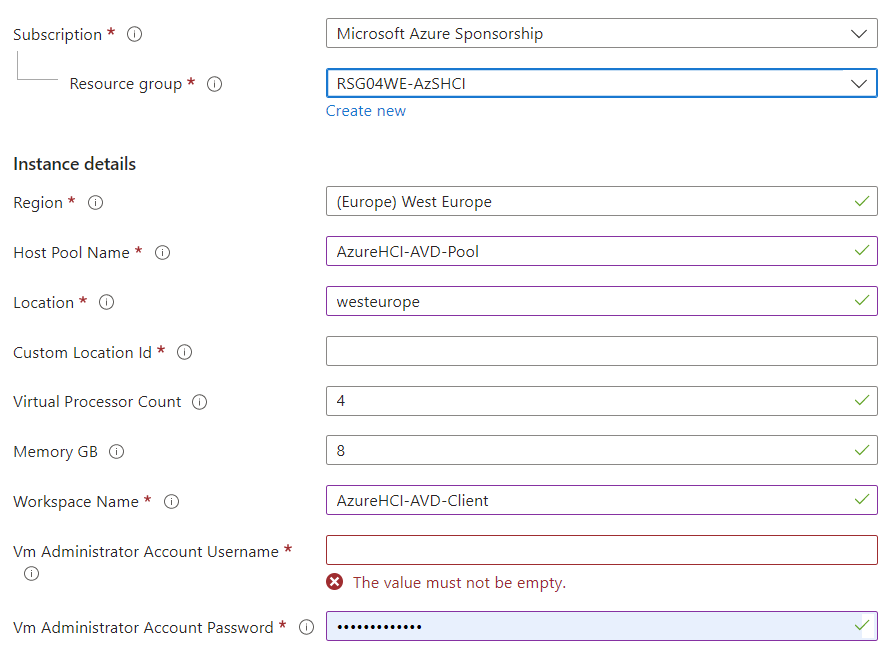
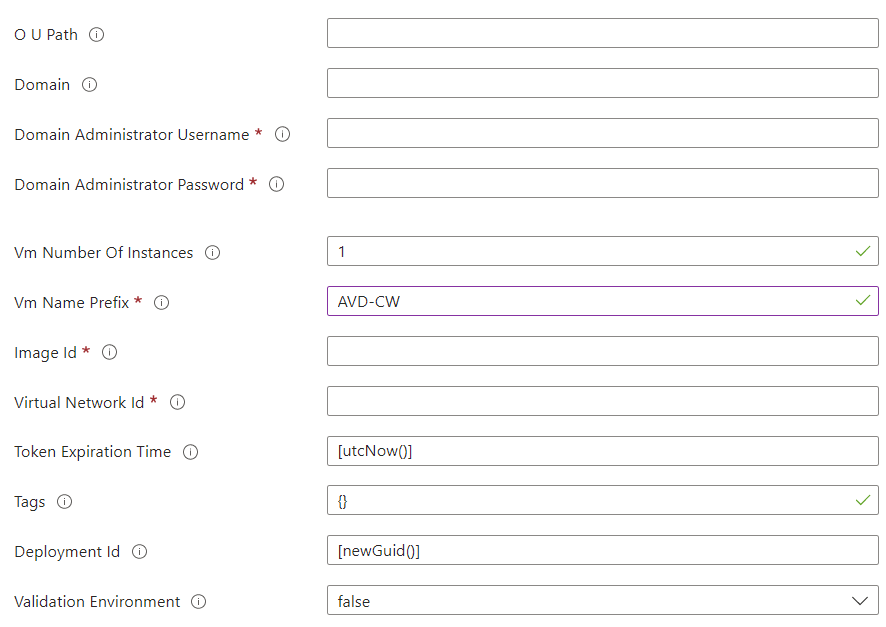
The two figures show an example of how to configure the pool. Obviously the data of the local admin, the domain to join and the credentials to do so are missing.
Other important aspects:
- CPU Count: The number of processors for each VM
- RAM: The amount of memory allocated for each VM, which is static during Preview
- VM Number of Instances: The number of VMs to create for the pool
- VM Name Prefix: The prefix of how to name the VMs
Note: pay attention to the VM prefix, because this value must not exceed 10 characters, given that the system then attaches a progressive to it (e.g. -0 / -1) in addition to the fact that it is used as the name for the domain join.
There are still three values that need to be parameterized and that need to be retrieved with their JSON:
- Virtual Network ID: The network to use
- Image ID: The Windows image to use
- Custom Location ID: where to place the pool
For each of these three elements, you will have to click on their object and view the JSON schema.

In my case I’m using the Windows 11 Enterprise Multi-Session SKU, which allows multiple remote sessions.
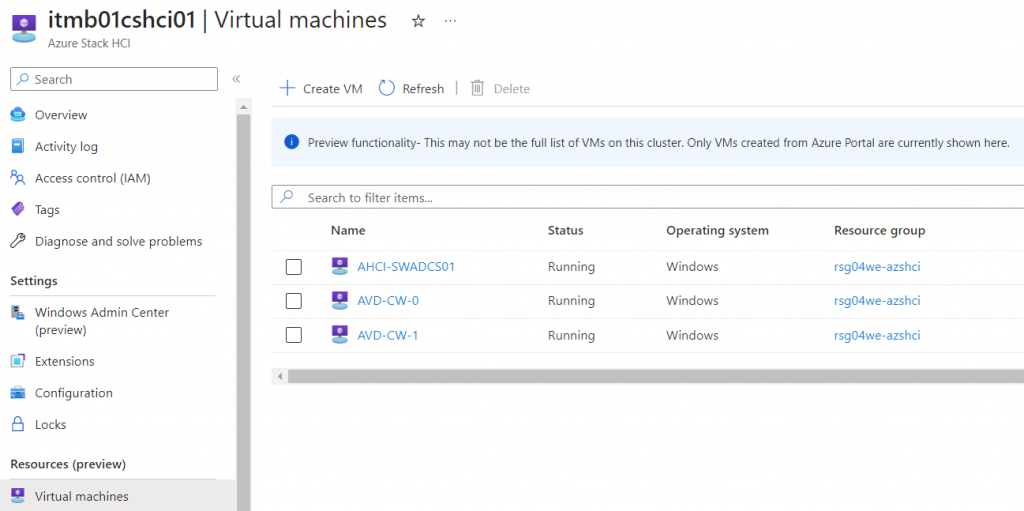
After about 20/30 minutes, depending on the complexity of the created pool, you will be ready to work on your clients. Remember that the wizard will also install the Azure Arc component to allow resource management from the Azure portal.
Pre-Publishing
Before publishing the pool to users, it is a good idea to prepare individual virtual machines for centralized management at its best. The first step is the configuration of FSLogix, because Windows 11 Multi-Session has this essential component for pool management of sessions. In addition to updating the agent with the latest version, it is necessary to create GPOs to define a network path where to save user profiles, any exclusions and everything necessary for correct optimization.
The last aspect is to assign the created pool to a group of users. This operation is done directly from the Azure Virtual Desktop section (Application group).
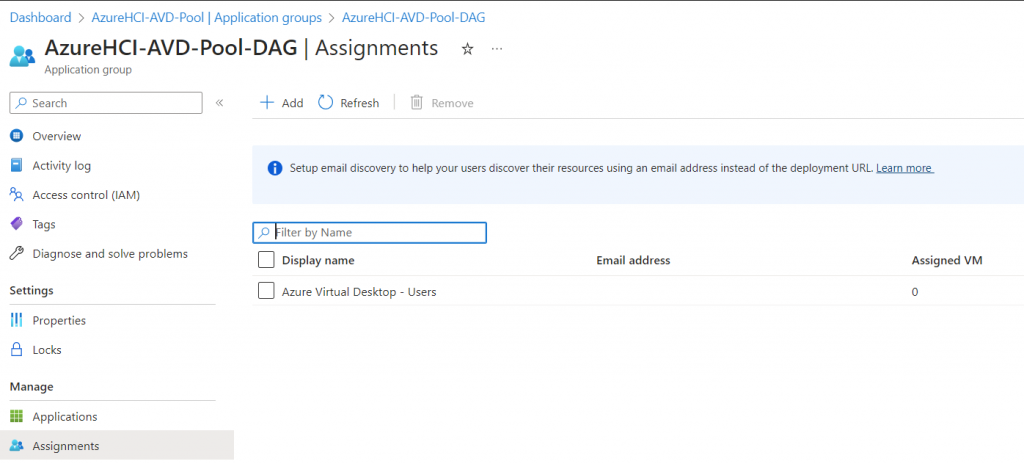
Note: the group must exist both on-premises and in the cloud, then synced via Azure AD Connect.
Publish
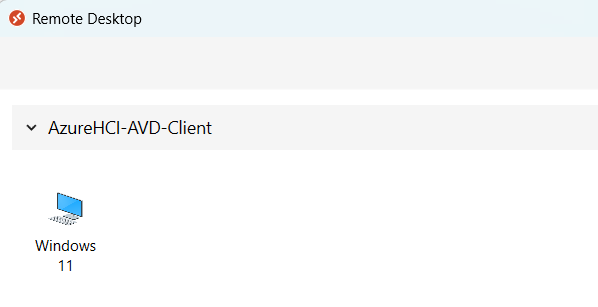
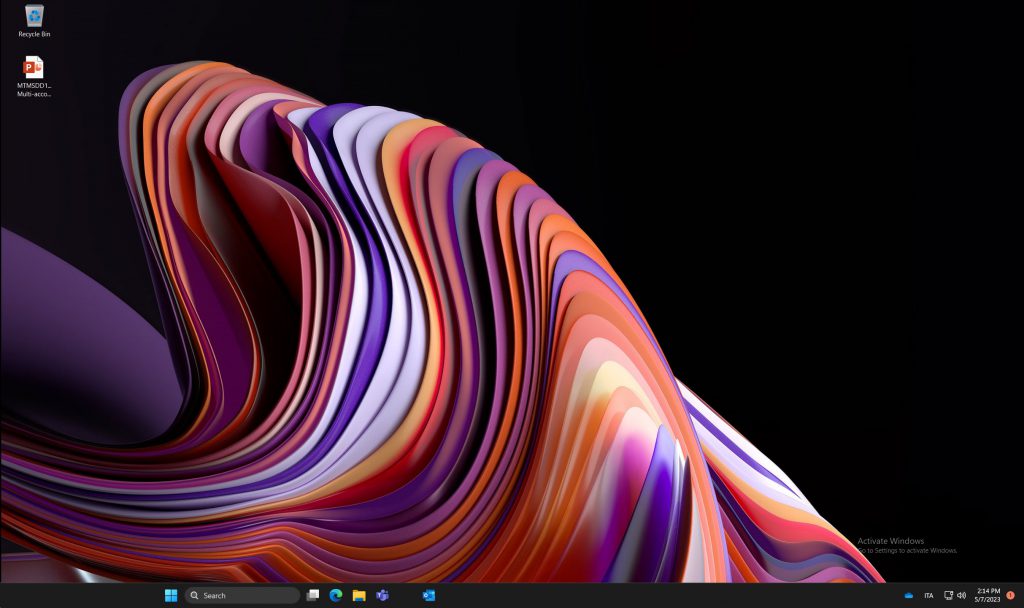
All that remains is to try what has been done and to do so it is necessary to use the Remote Desktop Client that can be downloaded from the Microsoft Store or from the Microsoft site, logging in with valid credentials and above all they are synchronized with Azure AD Connect, between on-premises and cloud.
Still in Preview
Since it is still a preview solution, we do not know the final usage prices. Also, it’s not possible to autoscale VMs, we can’t turn on VMs on first user connection and other little things. You can find the detail in this article – Azure Virtual Desktop for Azure Stack HCI (preview) overview | Microsoft Learn.
Get Started
Azure Virtual Desktop is certainly not a new technology, but the possibility of using it within Azure Stack HCI opens up new scenarios for the implementation and management of VDI environments by companies, especially for those who want to make the most of the hybrid cloud.
#DBS


