Questo articolo è disponibile anche in lingua italiana al seguente link: Microsoft Endpoint Manager: implementare le Proactive Remediation | WindowServer.it
Checking the compliance of our endpoints also depends on how we implement remediation policies. Nowadays, remediation can be done on an incorrect configuration or on software that we do not consider compliant with company standards, or that can undermine security. In the case of software, while it is true that every user should NEVER be a local administrator, it is also true that by now many software houses have worked out to allow the installation of their products directly in the user profile and this means skipping administrative permissions; this forces IT administrators to take preventative action and block prohibited actions.
Everything is easy in practice but in theory it becomes more complex, even more so today that users are no longer in the office and in which cloud-oriented management solutions are increasingly taking hold.
Microsoft Endpoint Manager allows you to manage remediation policies through its portal and in this article we will see how to uninstall software that is not deemed to comply with our indications.
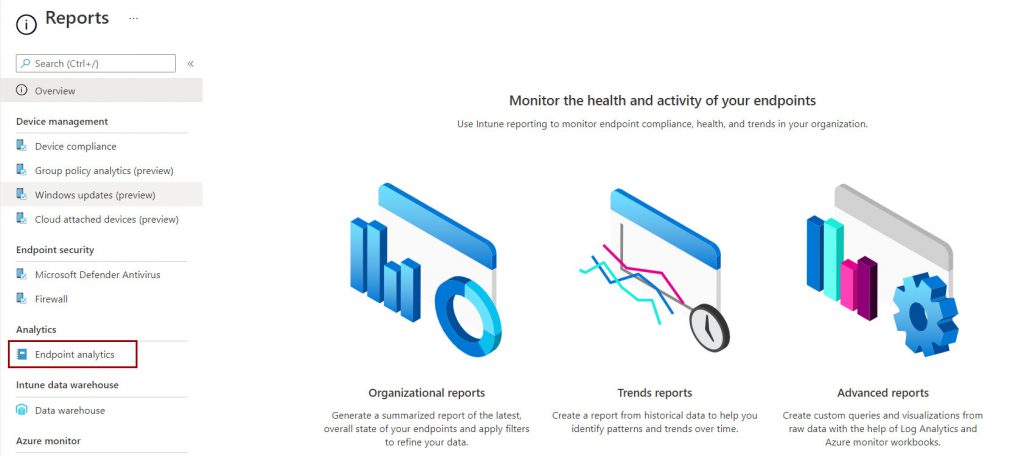
Enable Service
The first thing to do is to activate the service but it is good to understand if the following prerequisites are met:
- Windows 10 Enterprise E3 or E5 (included in Microsoft 365 F3, E3, E5)
- Windows 10 Education A3 or A5 (included in Microsoft 365 A3, A5)
- Windows Virtual Desktop Access E3 or E5
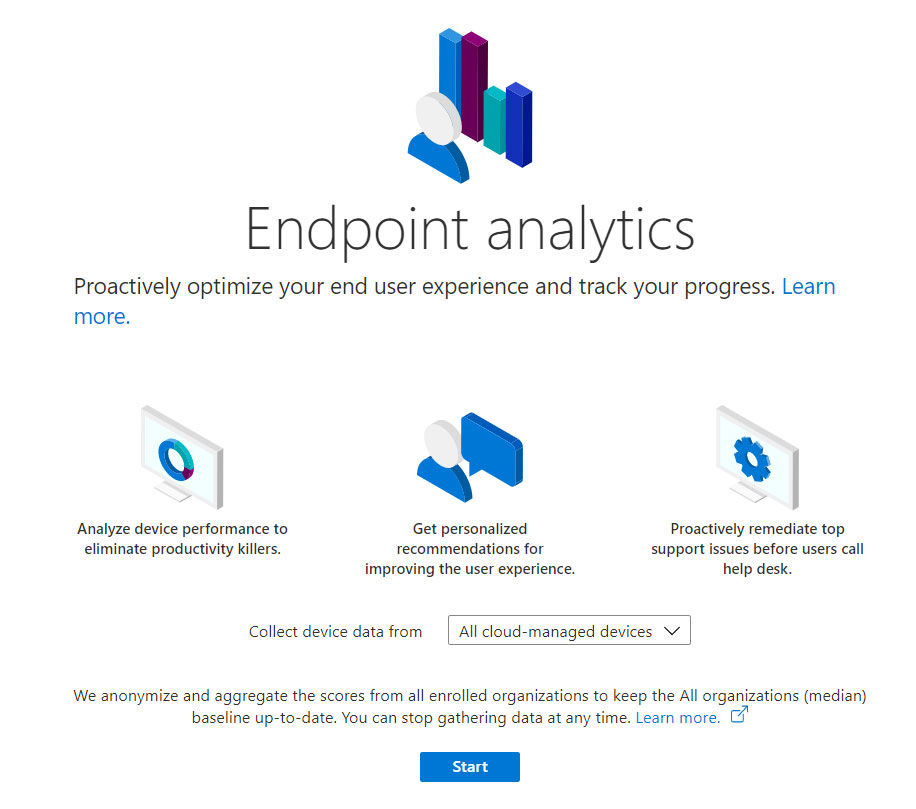
Once the conditions have been accepted, figure 3, it will be possible to proceed with the configuration of the various remediation.

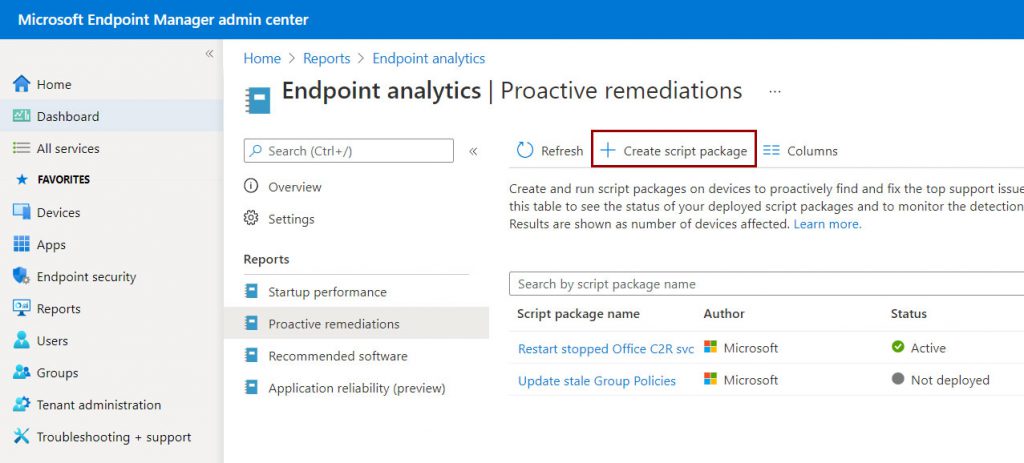
By default there are two packages, figure 4, which you can also activate to better manage the Office 365 service (required for updates).
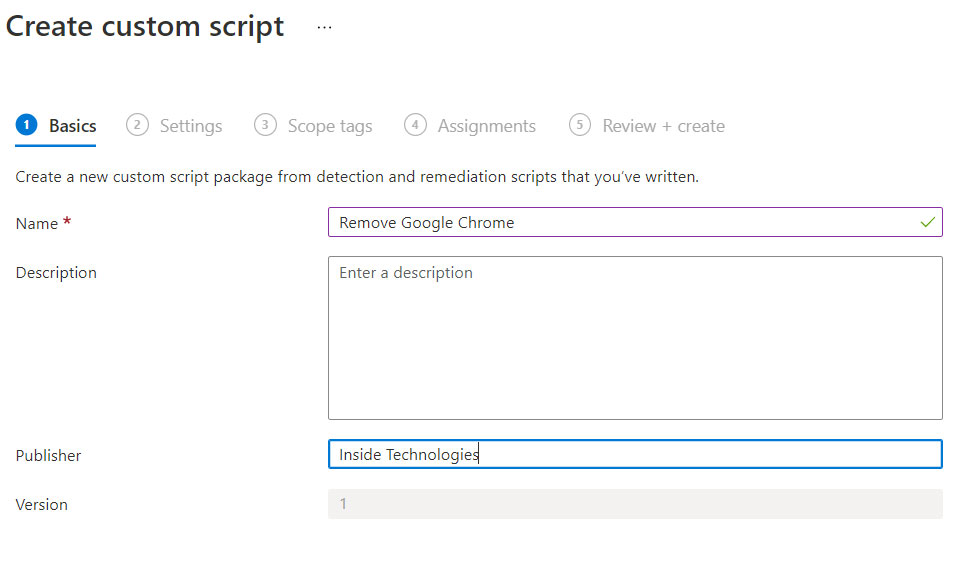
To create a new script, click on the button to start the configuration wizard – figure 5. Assign a name and the publisher, which can be the company or the person who created the rule.
The package consists of two scripts: one for verification and one for remediation. In this case we are going to remove Google Chrome installed per user, so the verification will be composed like this:
Try
{
    $LocalAppData = $env:LOCALAPPDATA
    $AppPath =  $LocalAppData+"\Google\Chrome\Application\"
    $EXEPath = $AppPath+"Chrome.exe"

    If ($(Test-Path -Path $EXEPath) -eq $True) {
        Write-Host "Google Chrome is installed"
        exit 1
        }
    else {
        #No remediation required
        Write-Host "Google Chrome is not installed"
        exit 0
    }
}
catch {
    $errMsg = $_.Exception.Message
    Write-Error $errMsg
    # exit 1
}
How do you find software installed per user? You can use this cmdlet in PowerShell:
Get-ChildItem “HKCU:\Software\Microsoft\Windows\CurrentVersion\Uninstall” | Where Name -Like “*chrome*”
The returned value will be used in both the detection and remediation scripts. To know the software removal syntax you can use these cmdlets:
$InstalledSoftware = Get-ChildItem “HKCU:\Software\Microsoft\Windows\CurrentVersion\Uninstall” | Where Name -Like “*chrome*”
$InstalledSoftware.GetValue(‘UninstallString’)
At this point all that remains is to load the remediation script which in our case will be the following:
Try
{
    $InstalledSoftware = Get-ChildItem "HKCU:\Software\Microsoft\Windows\CurrentVersion\Uninstall" | Where Name -Like "*chrome*"
    $TmpPath = $InstalledSoftware.GetValue('UninstallString')

    $LocalAppData = $env:LOCALAPPDATA
    $RemovePath =  [regex]::Matches($TmpPath, '".*?"').Value -replace '"'
    $AppPath =  $LocalAppData+"\Google\Chrome\Application\"
    $EXEPath = $AppPath+"Chrome.exe"

    If ($(Test-Path -Path $EXEPath) -eq $True) {
        Stop-Process -processname chrome -Force -confirm:$false
        (Start-Process -FilePath $RemovePath -ArgumentList "--uninstall -channel --verbose-logging" -Wait -Passthru).ExitCode
    }
}
catch {
    $errMsg = $_.Exception.Message
    Write-Error $errMsg
    # exit 1
}
By analyzing the script, we understand that the uninstall value is recovered again, to be saved in a variable, while the process is killed before starting the uninstallation operation. The final result will be like that of figure 6.
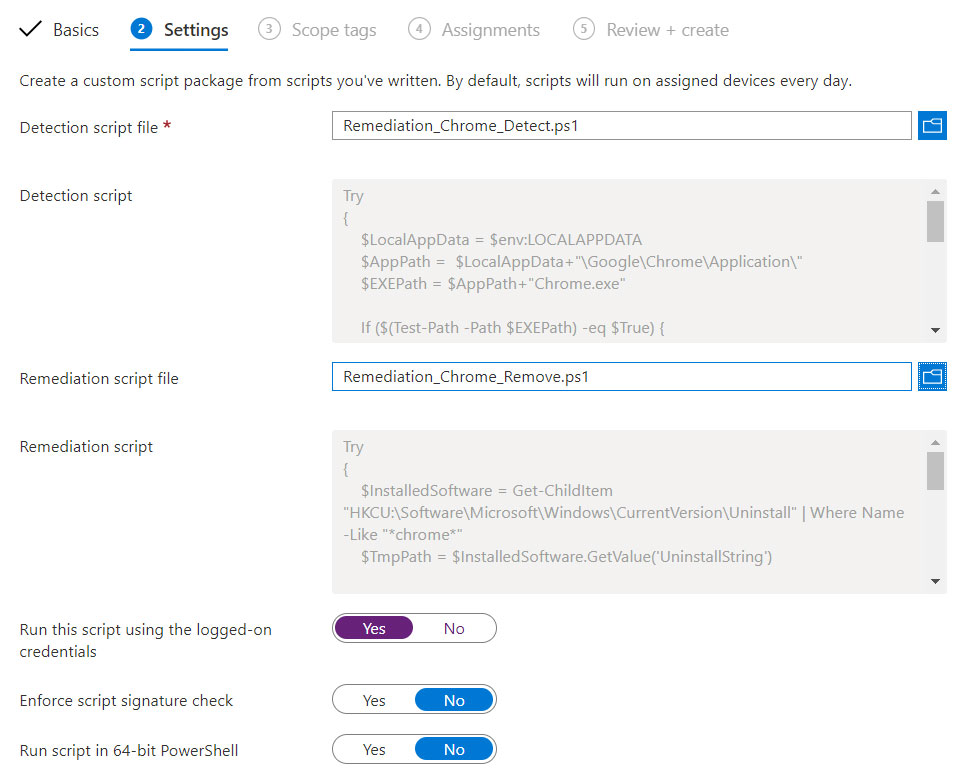
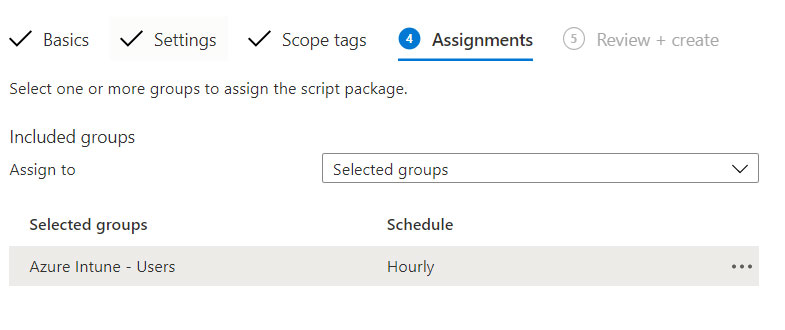
The script must run in a user context, which is why you must select the Run this script using the logged-on credentials entry. Assign the script to a group of users, figure 7, and wait a few hours for the system to start working.
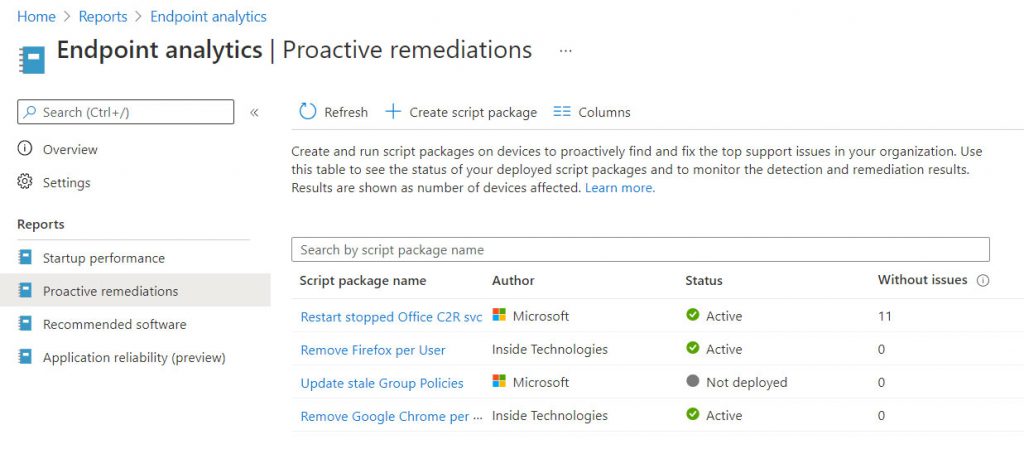
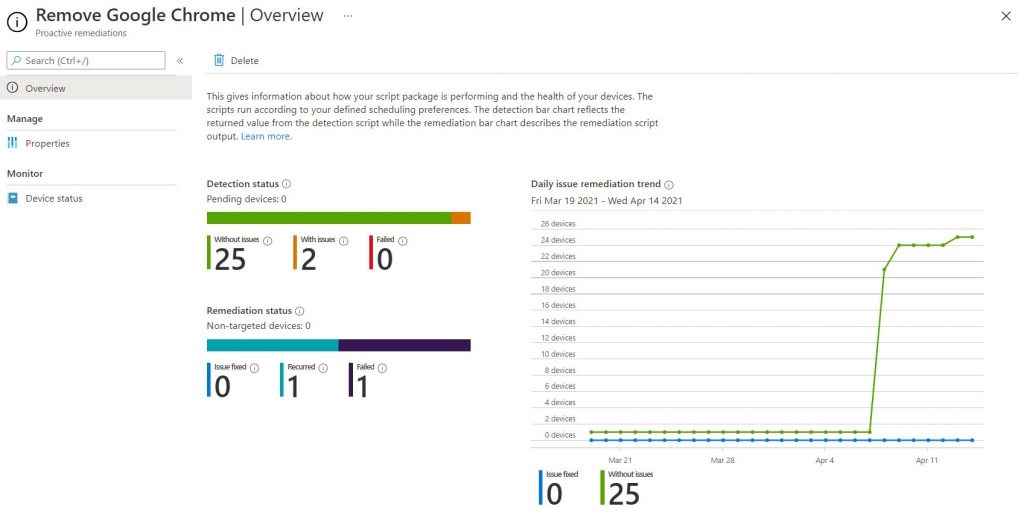
The status of the scripts will be visible through a dashboard – figure 8.
Troubleshooting
How do I know that everything is working correctly? In the folder C:\Windows\IMECache\HealthScripts you will find the various packages always named as detect.ps1 and remediation.ps1.
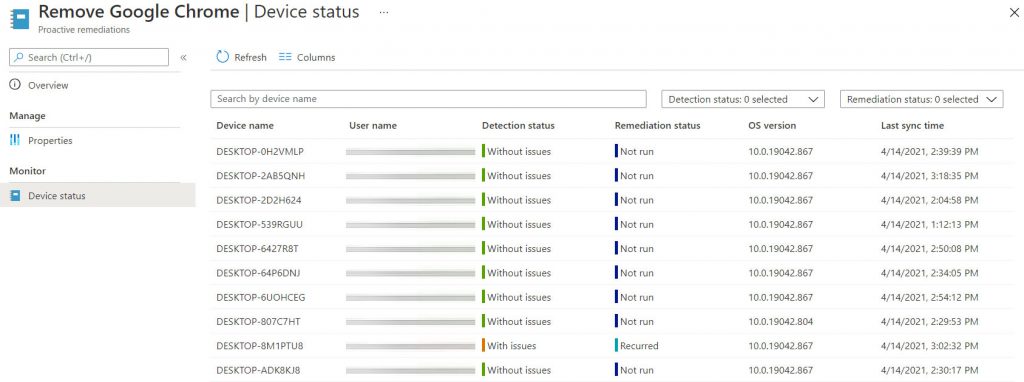
If you want to see the detailed trend, you can drill-down on the individual rules to see the status – figure 9 – and which are the endpoints on which the remediation has been applied – figure 10.
Conclusions
Proactive Remediation is certainly a very important tool for creating security compliance but also for performing client management tasks, such as patch installation, service deactivation, driver installation and much more.
#DBS