Make Microsoft Intune similar to System Center Configuration Manager is one of main goal that the product team is working on since long time. During the last Ignite was announced a new feature that allows the Win32 apps deployment in a way much easier than past.
Since last month, the only way to deploy an application to our remote client was use a PowerShell script. The system works fine but it wasn’t very simple because requires scripting knowledge and a remote repository where collocate the source files (like Azure Blob).
In this article I will show you how to use the new method to deploy an application via Intune.
Building
The first step is convert the application (.msi or .exe) into a format known by Intune and to do this is necessary download a tool available from this link: https://github.com/Microsoft/Intune-Win32-App-Packaging-Tool. Don’t forget to follow the GitHub page to know when the new build is released.
Once the tool is in your PC, it will be possible convert the setup file with this syntax: .\IntuneWinAppUtil.exe -c “C:\Users\Oem\Downloads\7Zip\” -s “C:\Users\Oem \Downloads\7Zip\7z1805.msi” -o “C:\Users\ Oem \Downloads\7Zip\”
The parameters accepted are:
- -c – the folder with all source files
- -s – the setup file
- -o – the folder with output file
If everything works fine, you will receive an output similar figure 1.

Figure 1 – Setup Convert
NB: be sure that the source folder contains only the necessary files for the deployment, this to avoid fails or errors during convert. The output folder can be unique.
Deployment
After you have converted all of our applications, it’s time to start the wizard inside Microsoft Intune; select the value Windows App (Win32) as showed in figure 2.
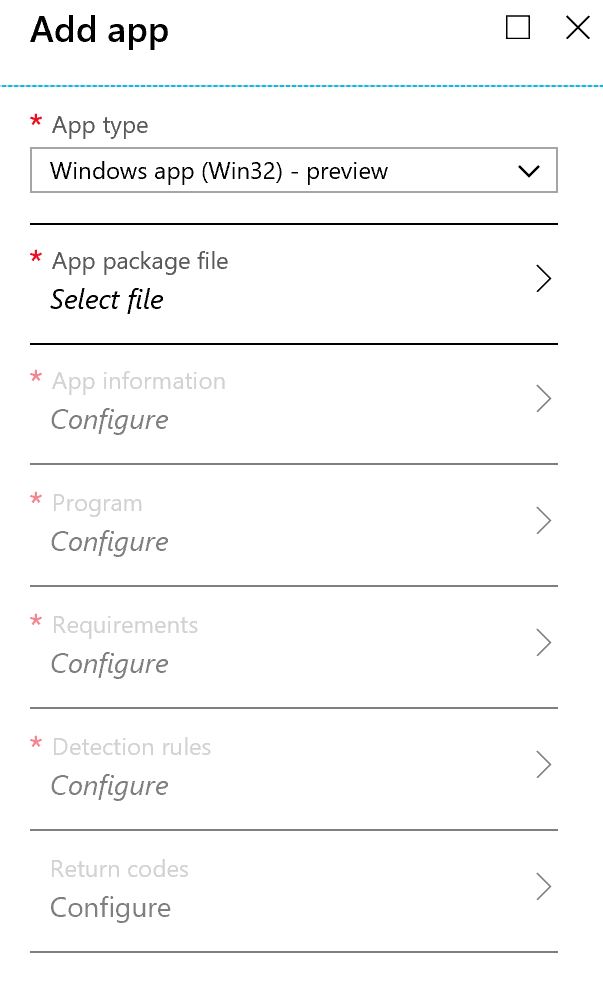
Figure 2 – New Deployment
Select the converted file – figure 3.
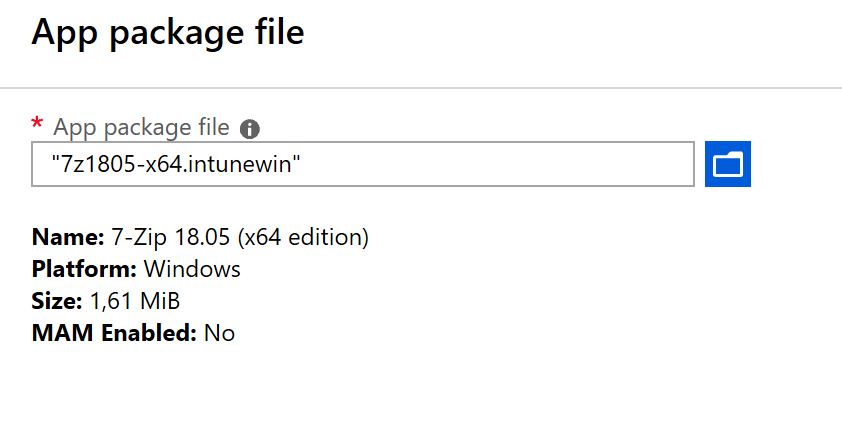
Figure 3 – Source File
The area App Information, figure 4, shows the information about the package to install and uninstall the software. Check the parameters because can be happen that some information are not reported correctly.
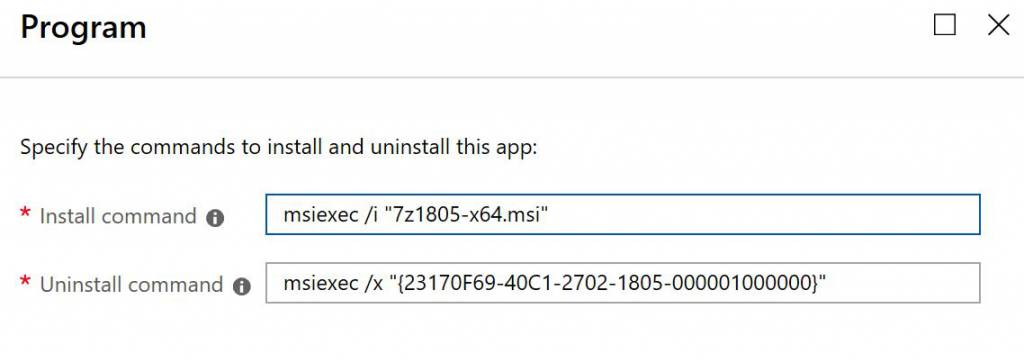
Figure 4 – Setup Command
Select the Requirements (minimum version of Windows and architecture) and jump into Detection Rule area, figure 5, where you can manage the methods to verify if the software is already installed into the target machine. It’s possible be less or more detailed, in terms to detect only the MSI code or a specific build version.
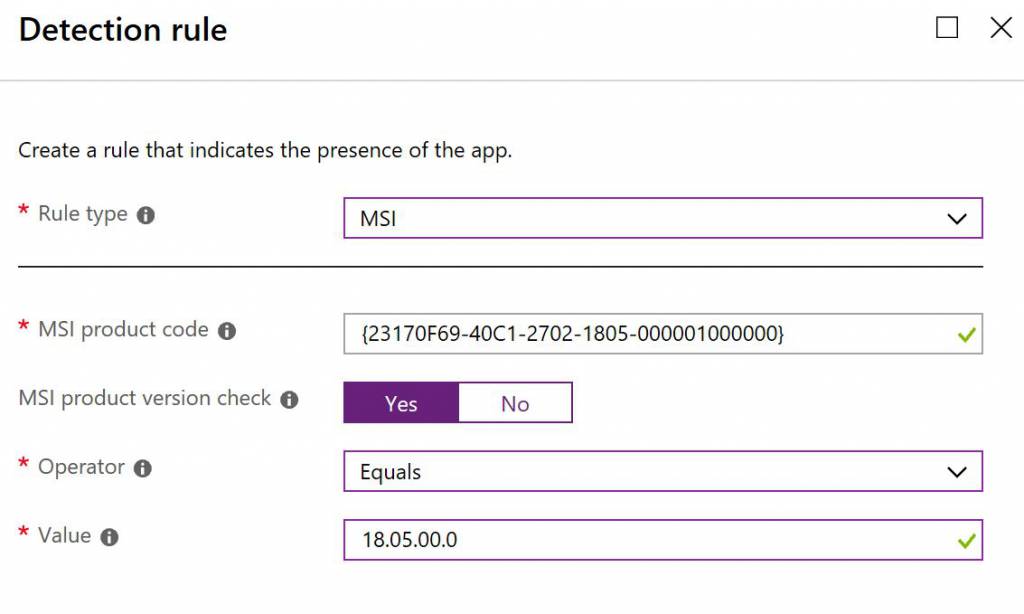
Figure 5 – Detection Rule
Close the wizard and select the destination target (System or User). Don’t forget that the upload file changes by the Internet speed but also by the source file dimension. Only when the upload will be finished, the package can be deployment.
In case the software was deployed as Available, the end-user will see it inside the Company Portal (another step to make it similar to the SCCM Software Center).
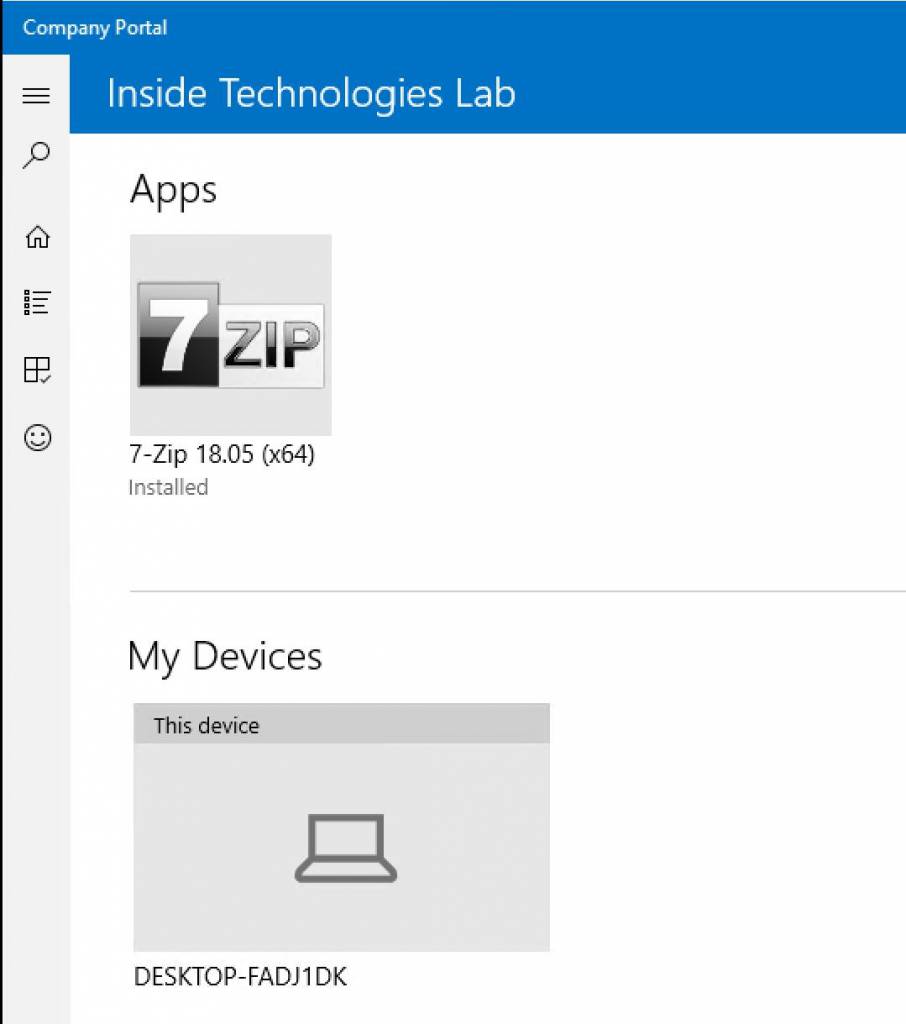
Figure 6 – Company Portal
It doesn’t matter if the end-user is not local admin, because the software will be installed without problem. This increase the security and resolves many critical limitations for all remote users. Similar like upload, the Internet bandwidth is critical to download the package. Once the task has been finished, the software will be available inside the Start Menu – figure 7.
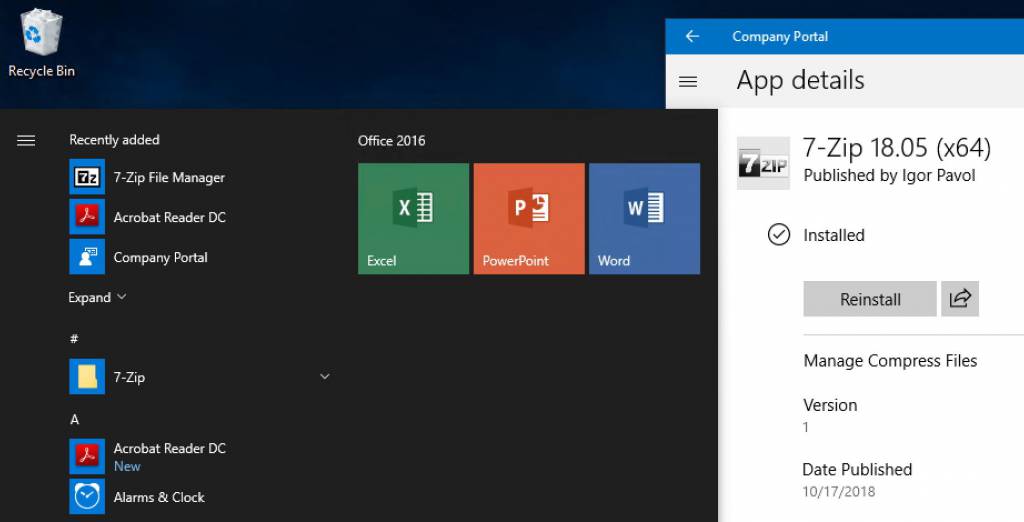
Figure 7 – Software Installed
Conclusion
This new method simply all the software deployment tasks and make Intune as main point for everything, thanks also to Company Portal. It’s very important analyze the log files inside the folder C:\ProgramData\Microsoft\IntuneManagementExtension\Logs, to verify if there are errors or fails (in the most of cases generated by wrong syntax and missing exit code); in case of problems, the resolution can be found inside the Intune portal, without touch the source file – and avoid a new upload.