One of the great new feature introduced in Windows Admin Center v2007 is the Cluster Creation extension, a new way to build hyperconverged cluster easily. In this moment the extension is in preview mode so not all the features are already available but the product team is working to close the gap.
In this article I will show you who to create a new HCI cluster from scratch based on Windows Server 2019. Some steps are skipped because very easy (like set IP address or cluster name).
From Windows Admin Center, add a new resource and the v2007 show us the new option for cluster.
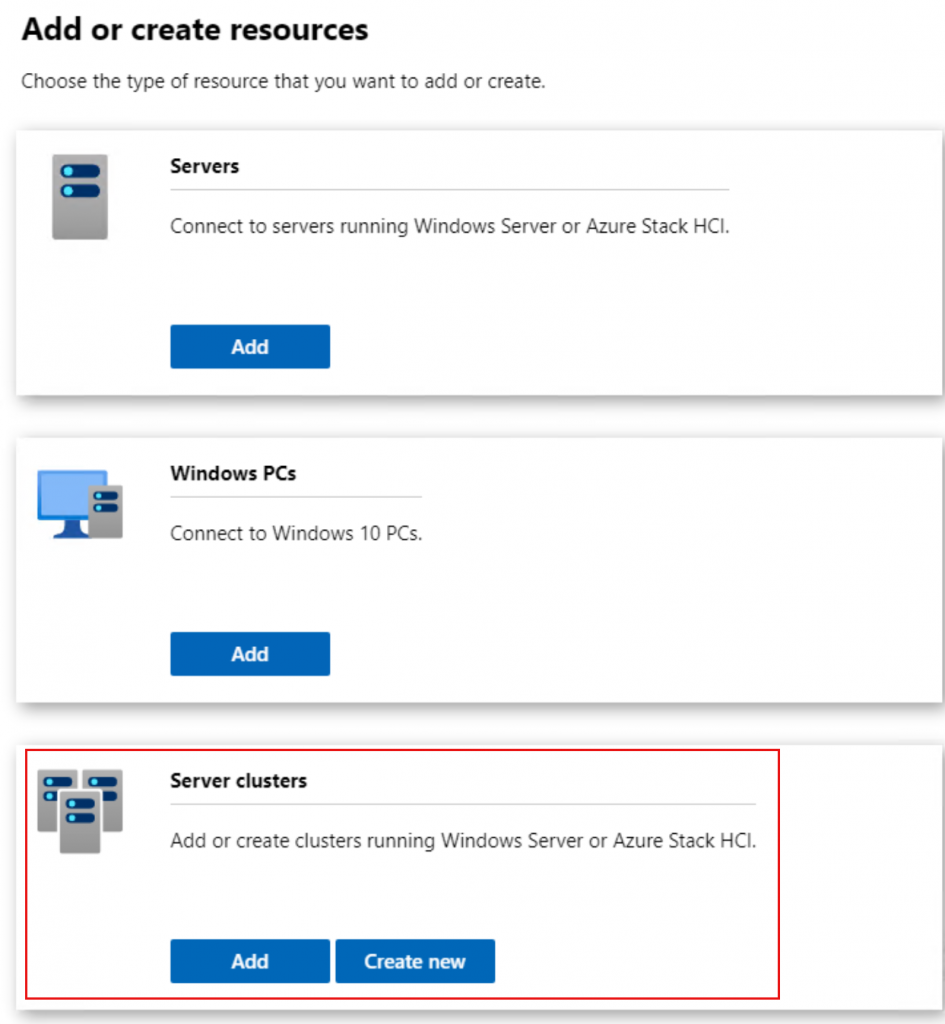
The preview mode allows us to create two kind of cluster: standard and Azure Stack HCI H20. In case you missed the news, during last Inspire, Microsoft has announced the next generation of Azure Stack HCI, a separate SKU with different features compared the classic stack based on Windows Server 2019. More details are available in this article: Azure Stack HCI H20 Announced.
As you know, Hyper-V can expose the virtualization engine also to a VM, if the hardware is capable to achieve the goal. This means run a VM into VM; on Azure this is also possible with the plan E, in case you want try this outside your infrastructure.
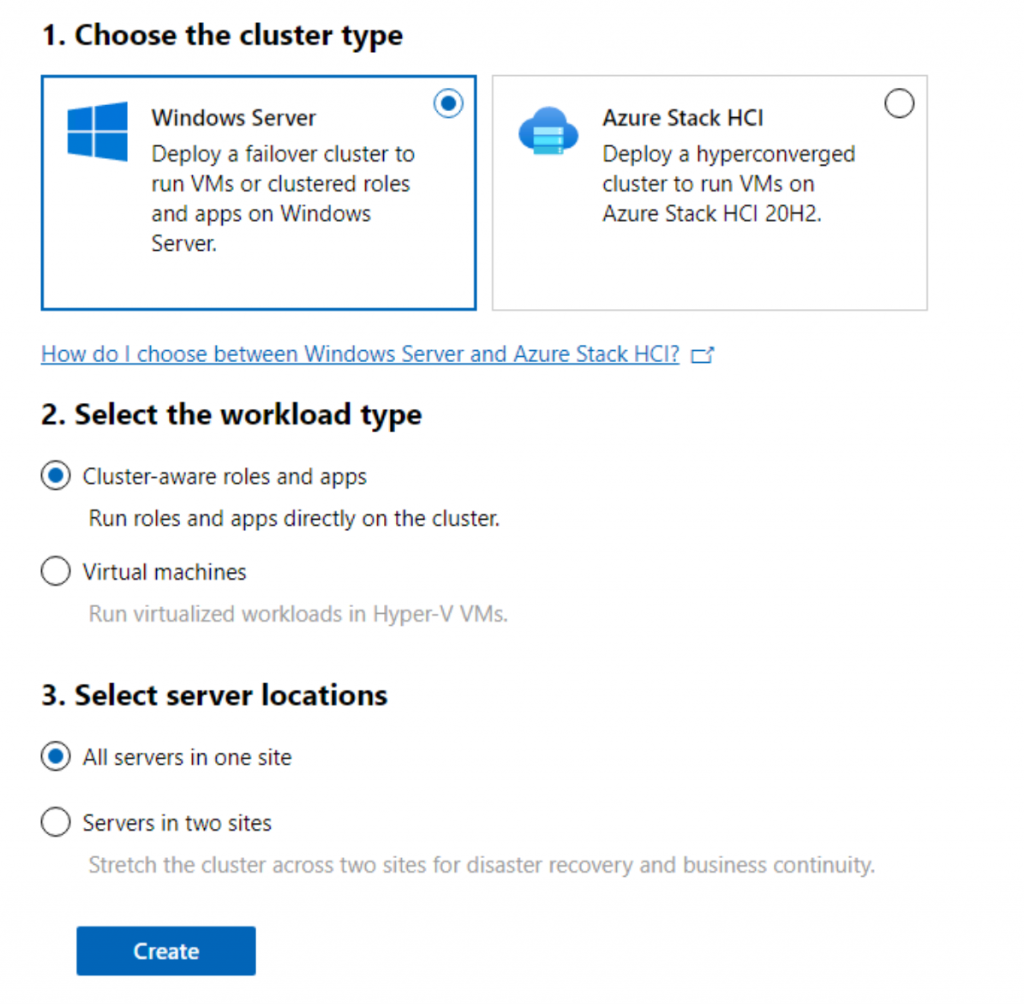
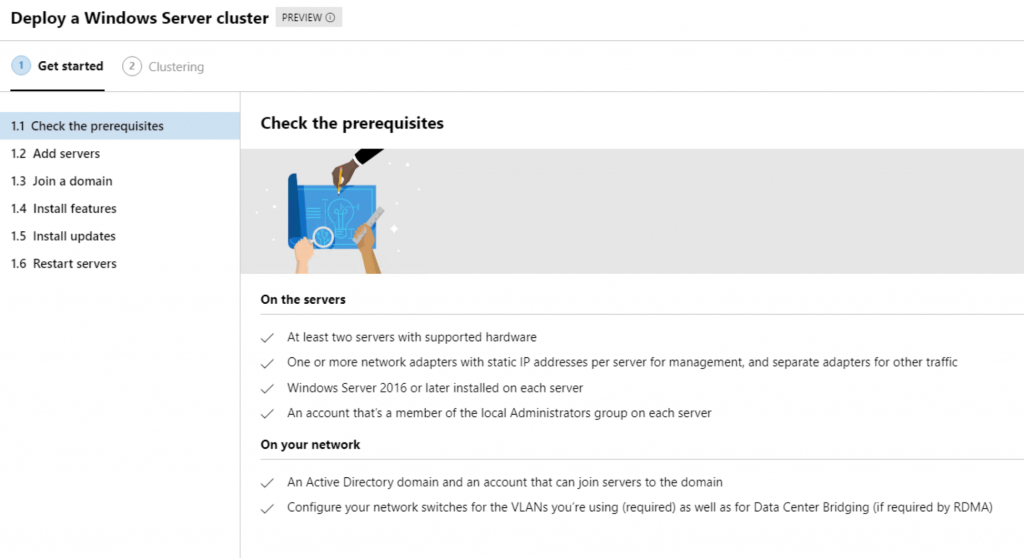
The idea of product team is make more simple and “beautiful” the deployment with a wizard clear and faster.
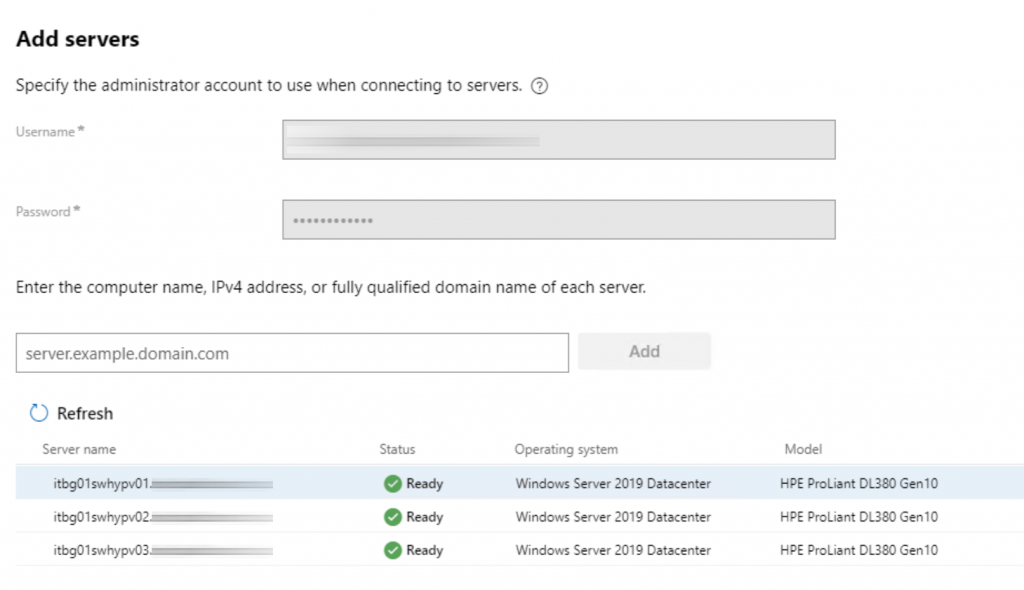
The first step is, as usual, with the insert of our nodes. In my case I want create a “classic” Azure Stack HCI with 3 nodes.
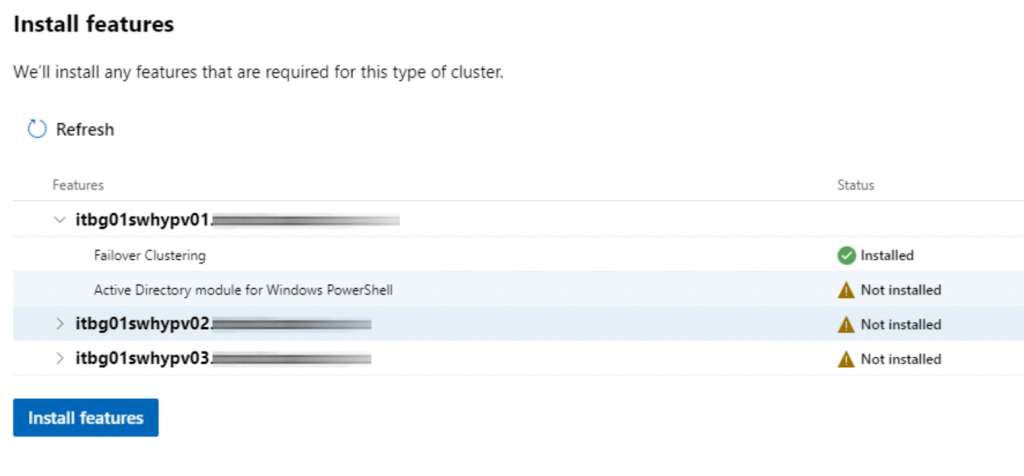
The wizard will check if all the requirements, in terms of roles and features, are already present in each node. In case, different from the Failover Cluster Manager, you can install them. Same thing for Windows Updates, because each nodes must be aligned at the same Cumulative Updates and this not only for the security but because can avoid errors and problem during storage sync or live migration.
Before the cluster will be created, is important validate the configuration because this allows you to go ahead but, the very important point, gives you the support from Microsoft. In same condition the cluster could not be validated, maybe because the CPU family are different between hosts, but this not means that the cluster cannot works.
Note: Validated is different from Is Not Working but Validated means Supported!

After the validation you will be able to finish the wizard and create your cluster that now is ready to be configured. Just to be boring, this is preview so many steps are not yet available and this means use other tools.
To create a new HCI cluster is necessary enable the Storage Spaces Direct (S2D), from one of node chosen during the wizard, with the command: Enable-ClusterS2D

This will enable the infrastructure to be used in hyperconverged mode and create a new repository for Perfomance History. Starting now, all the task can be done from Windows Admin Center.

A cluster is not a cluster without a volumes and the Create button is what we need to achieve the goal. The configuration depends by your storage layout, for this reason before start check this article: Choosing drives for Storage Spaces Direct.

Now the cluster is ready to be used but you I suggest to make a little tuning about:
- In-Memory Cache
- Live Migration network
- Live Migration configuration
- Storage Cache
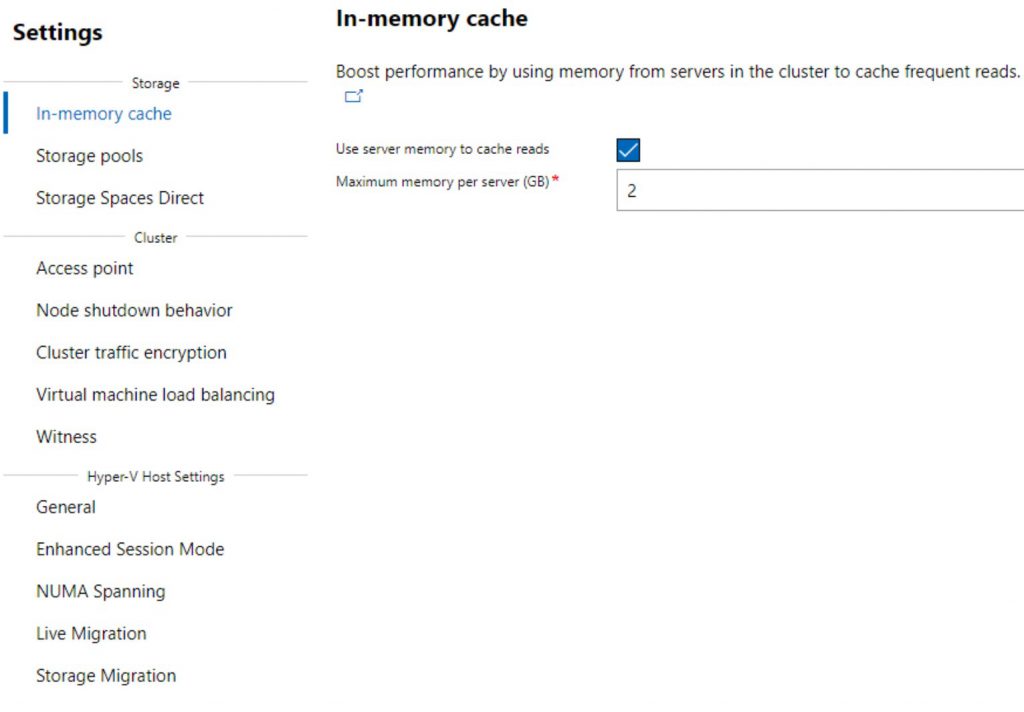
In-Memory Cache is important to boost performance but use the RAM of each node, so don’t abuse. Configure 10GB doesn’t means increase performance x10; before change value, check this article: Using Storage Spaces Direct with the CSV in-memory read cache.
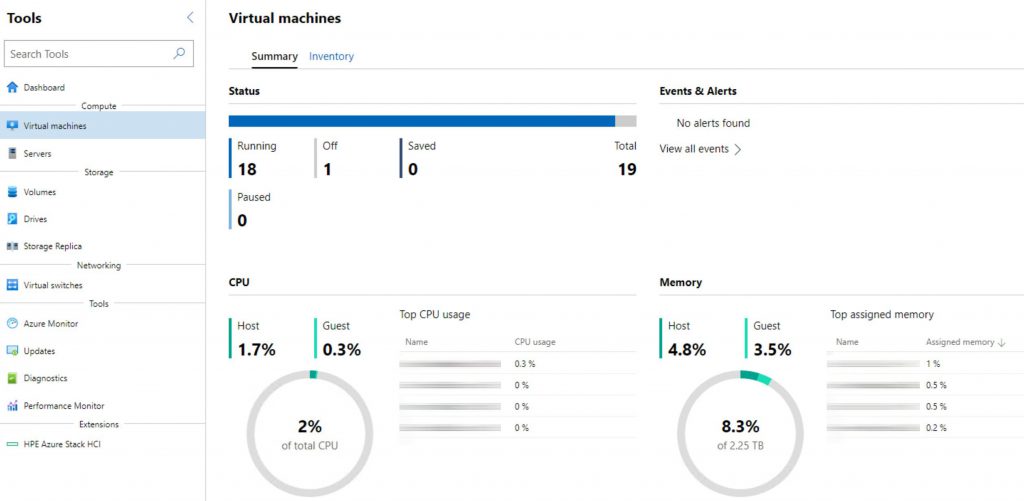
Ready to create your virtual machine from Windows Admin Center!
Consideration
The new cluster creation extension is absolutely a great tool to simplify some tasks. The product team is working hard to implement some new features to customize better the stack, so keep in touch because as I said many times: Windows Admin Center is the Future!
Get Started
Download Windows Admin Center!
#DBS


