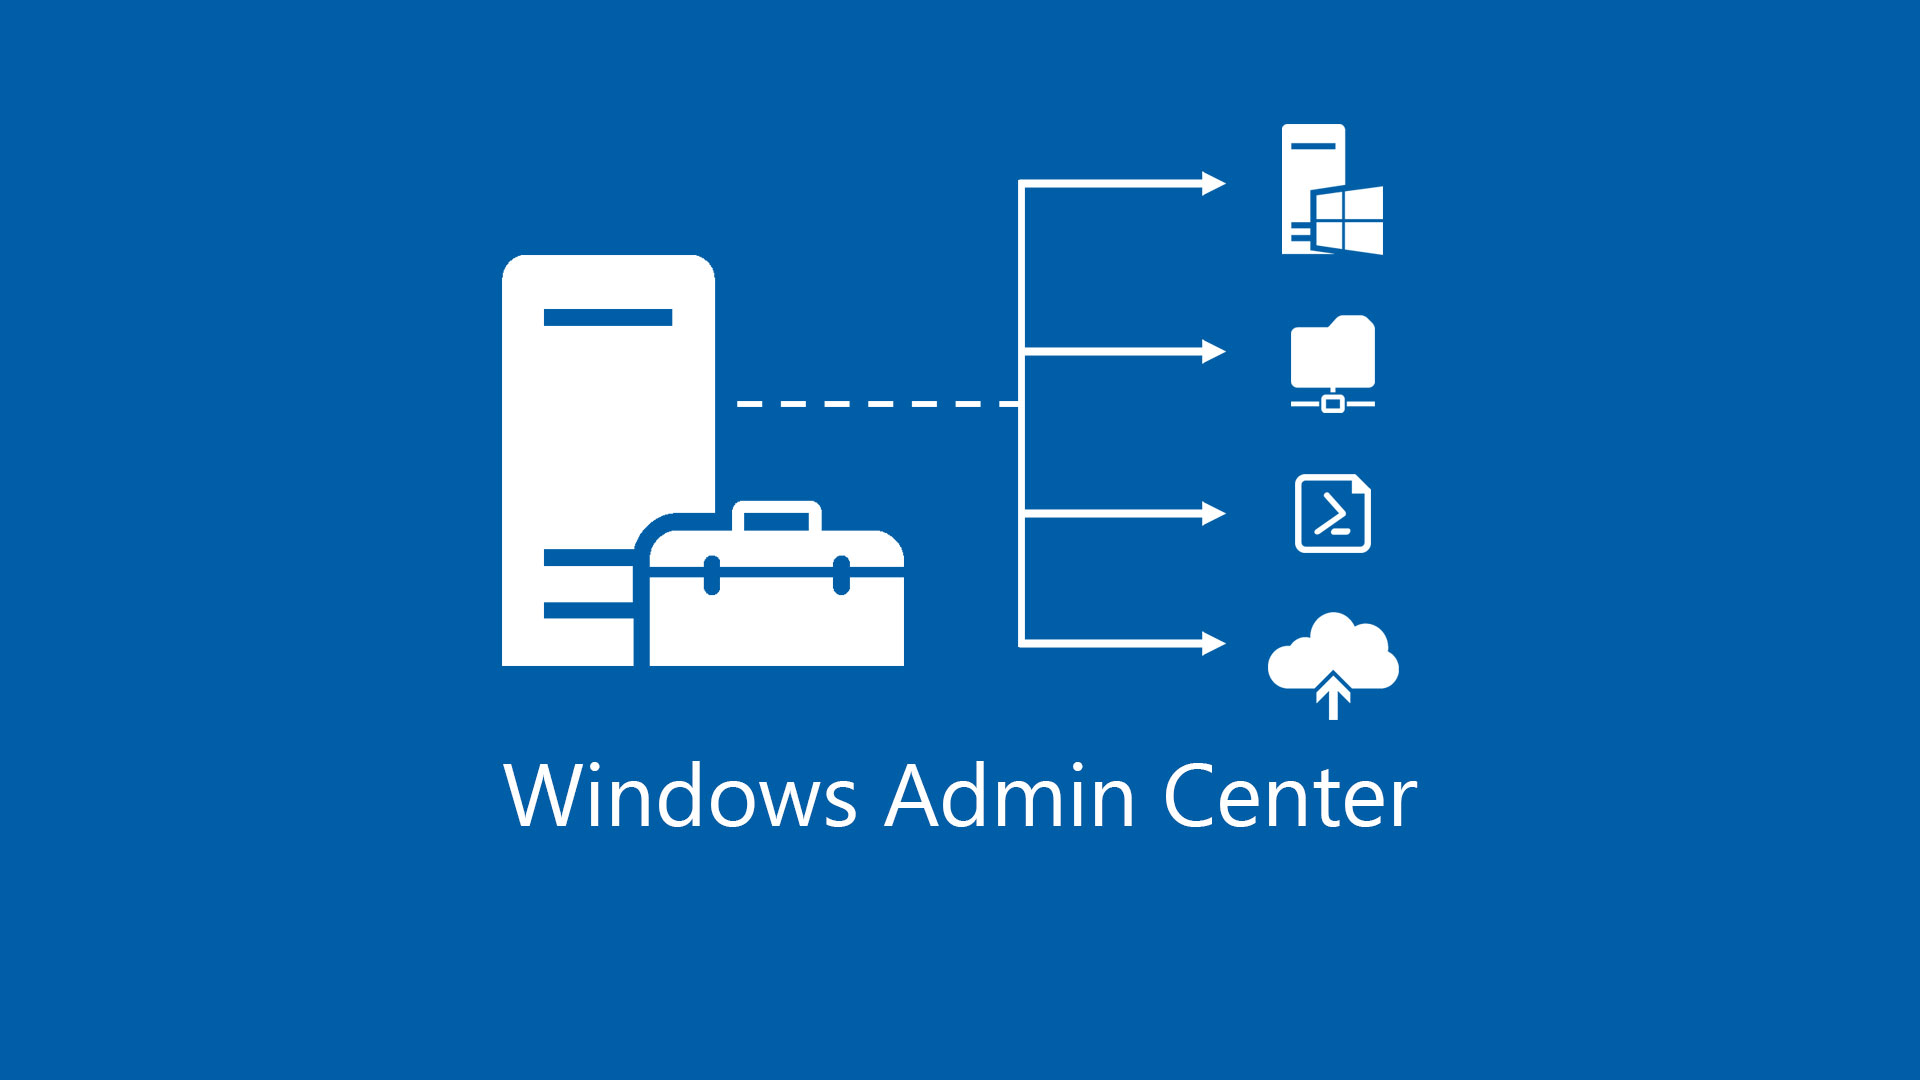
New chapter dedicated to Windows Admin Center. Into the first part, I showed how to integrate WAC with Microsoft Azure and how to use the Backup extension to protect the content of single virtual machine, thanks to integration with Azure Backup.
In this article we will see how to extend the protection to an entire Hyper-V host, with Azure Site Recovery. Before starts, check to have enabled the integration with Azure (check these steps in case).
Azure Site Recovery
Integration between Windows Admin Center and Microsoft Azure allows you the possibility to protect your datacenter and extend Hyper-V with Azure Site Recovery. ASR is a service present in Azure where your VMs are replicated with on-premises hosts, in order to provide a disaster recovery site outside your company; the result is reducing the downtime in case of big failure. Obviously, plan ASR model is not easy and unless you have a standalone machine, many pre-requirements are needed but the idea is amazing.
To set up your host with ARS, is necessary work on the Hyper-V machine, open the Virtual Machine area and then click on the object and use the menu More – figure 1.
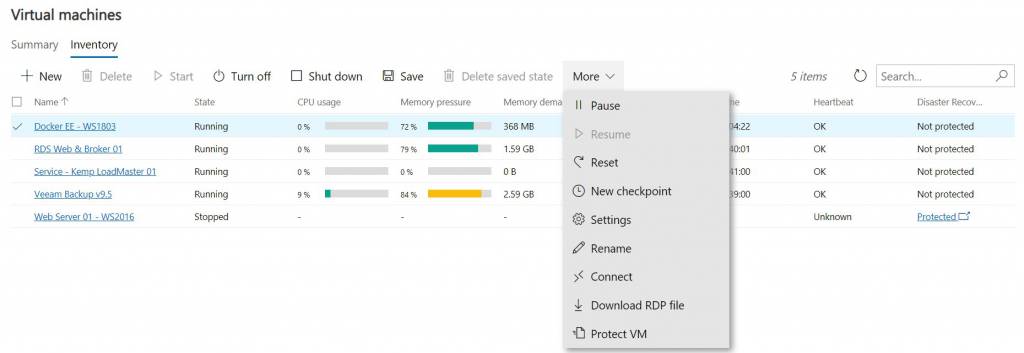
Figure 1 – Set up VM Protection
Similar like Azure Backup, ASR allows to use an existing Resource Group and Recovery Vault, as showed in figure 2. The procedure will install the MARS agent and configure the object inside your Azure subscription.
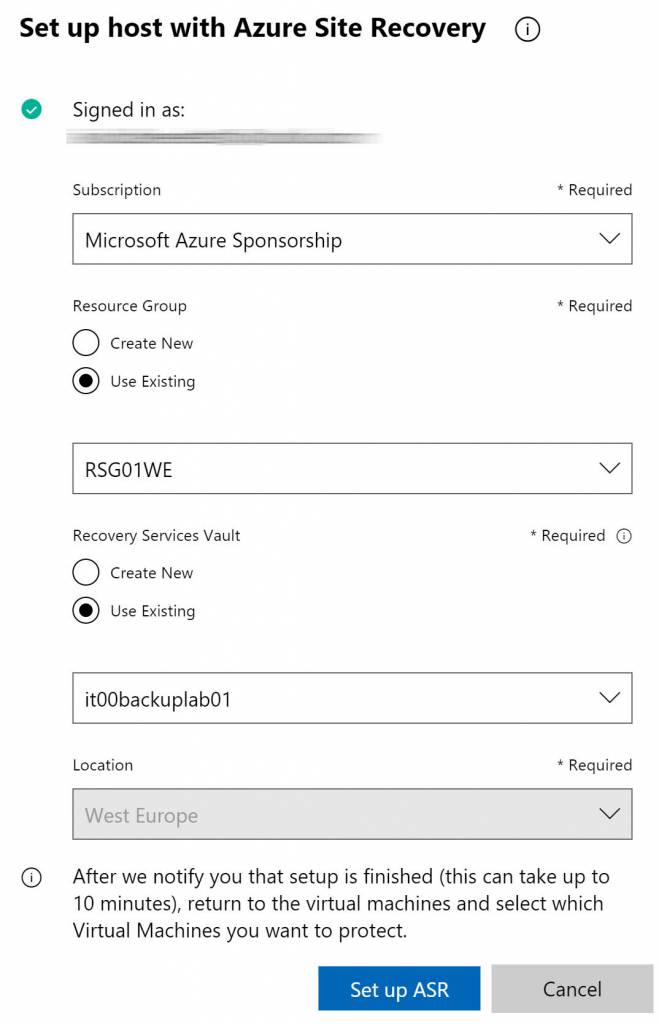
Figure 2 – Set up ASR
When the agent will be deployed, the Hyper-V will be allowed to protect each single VM. Bear in mind that in this moment there are a couple of “limitations” present inside the console:
- There’s no way to select the Azure VM plan
- There’s no way to select Managed Disks
- There’s no way to select the Hyper-V Site
In few minutes your host will ready and to be sure, it’s possible check the new Hyper-V Site in ASR.
Remember that the Retention Policy called smepolicy, figure 3, cannot be substitute with another one. In case you have already created another Retention Policy, this cannot be assigned to Hyper-V Site called smepolicy to avoid the replica fail.
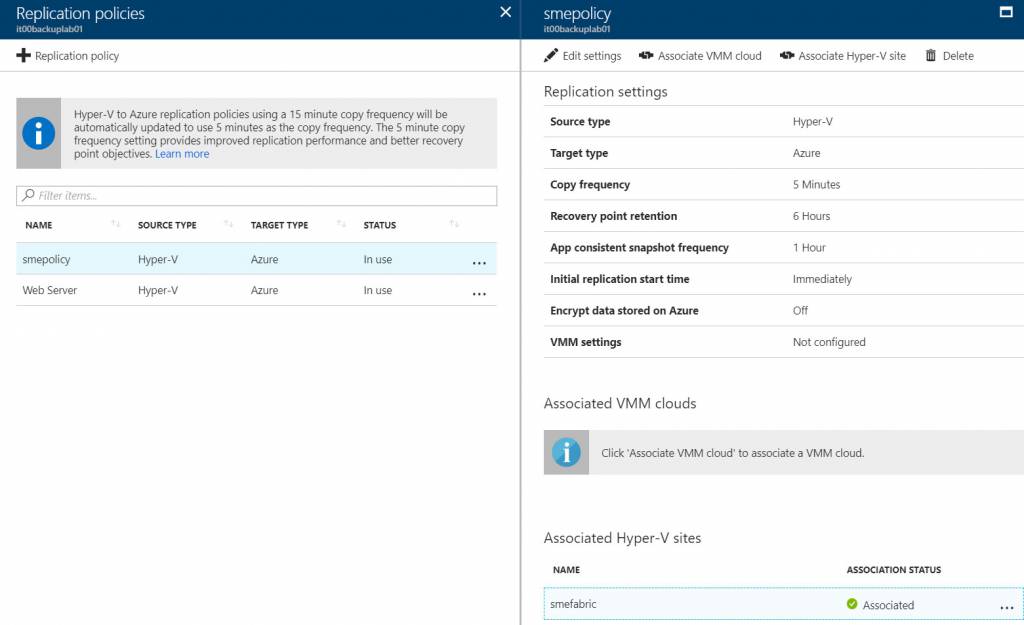
Figure 3 – Retention Policies
Protect Virtual Machine
When the host will be ready, click on the virtual machine that you want protect and use the menu to start the wizard – figure 4.
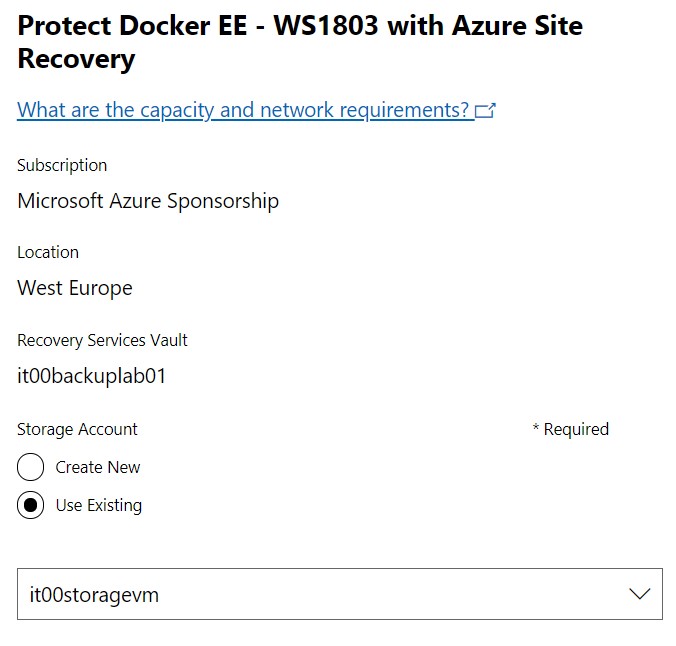
Figure 4 – Protect VM
After a couple of hours, depending by the Internet speed and the VHDX size, your virtual machine will be replicated on Azure. In Hyper-V console you can view the replica status, figure 5, and into the backup vault you can see the Replicated Items, as showed in figure 6.
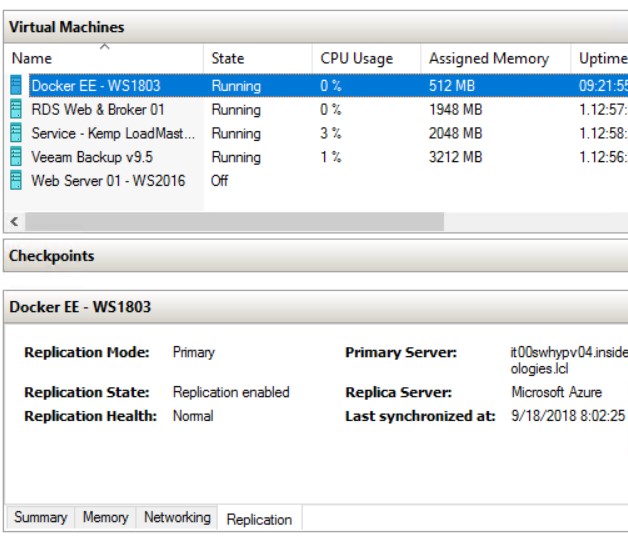
Figure 5 – Hyper-V Replica Status
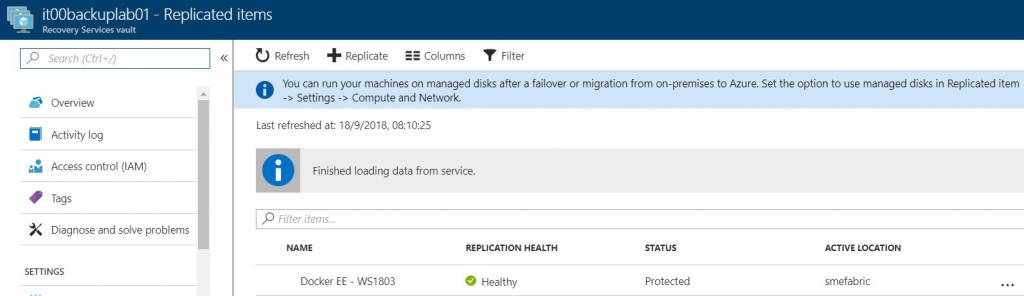
Figure 6 – ASR Status
To close the procedure and make possibile the failover, don’t forget to configure the VM on Azure as showed figure 7. Without this procedure, the replica will fail!
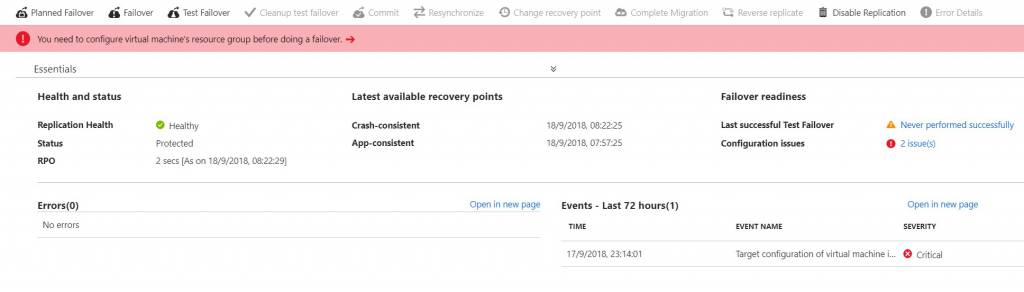
Figure 7 – Configure ASR
By default, some settings are missing like:
- Resource Group
- VM Size
- Network
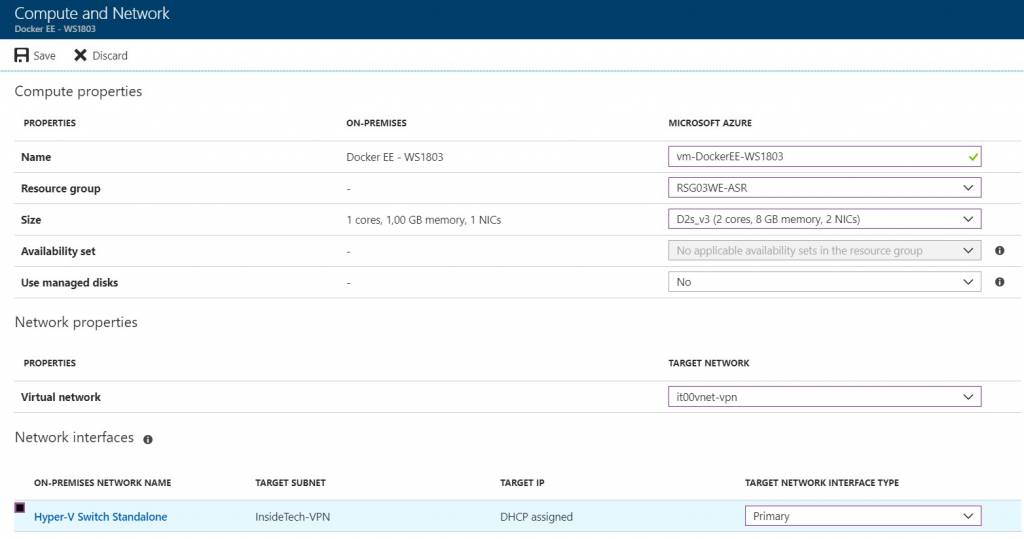
Figure 8 – Configure Replica VM
Failover
In case you want run a Failover Test, a Planned Failover or a Failover, you must use the Azure portal. It’s not clear if there will be a plan to change this procedure but at the end of all, I don’t think that is a critical point because if the requirement is run the protected VM is just because the entire infrastructure is down and this will be true also for WAC console.
Conclusion
The integration with Azure Site Recovery is another great brick in the wall to extend our infrastructure to the cloud and reduce the effort from the IT departments. The product team is working to improve the extension and make easier our life.