Windows Azure is a wonderful tool for each one who want have a lab environment on-demand, because the virtual machines can be turned off and turned on by our necessity. MSDN subscribers, or Microsoft Partner Network with Cloud Essentials, have credit on Windows Azure to use all the services.
Infrastructure as a Service (IaaS) is perfect also for the companies who wants increase the availability of their infrastructure, without implement particular cluster service or remote datacenter. Whatever is your necessity, IaaS is the good choise!
So the question is: how I can create a lab environment, with Domain Controller and File Server, to test the new Windows Server 2012 R2 features?
First of all, open Windows Azure and sign-in with your Microsoft Account. The first step is create a Virtual Network, in Custom mode, where you must insert the values, as showed in figure 1 and 2.
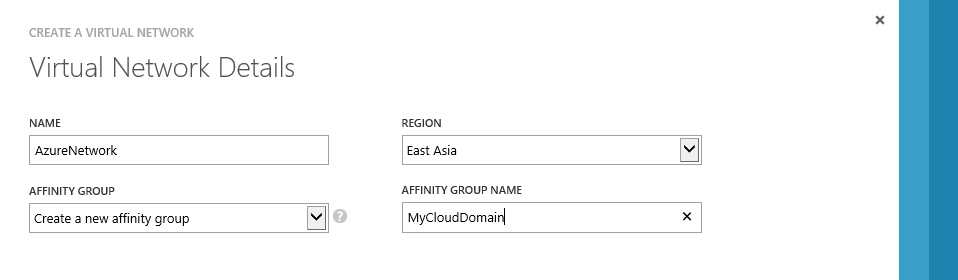
Figure 1 – Affinity Group Creation
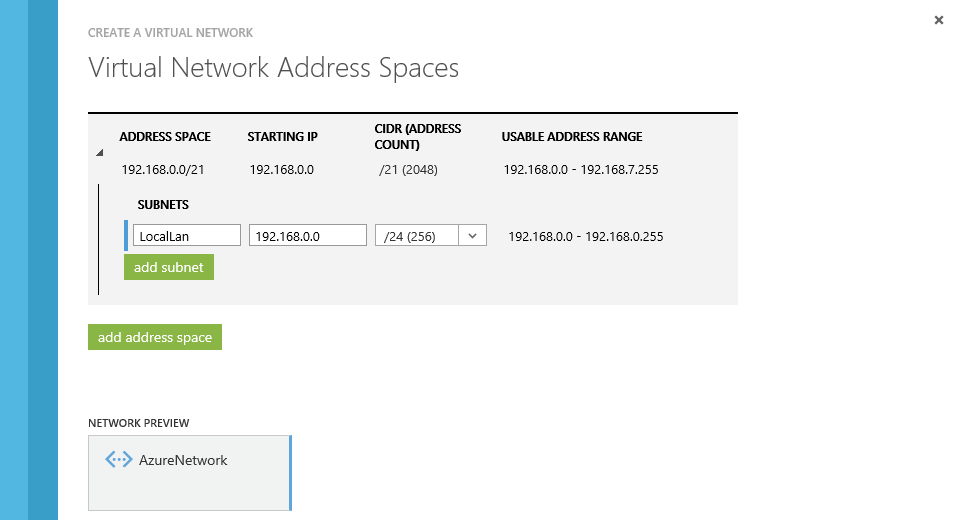
Figure 2 – IP Address Setting
After that, create a new Cloud Services: this will be the bridge between VMs; if the VMs don’t use the same Cloud Services they can’t communicate together. It’s important insert the resource in the same Affinity Group where you have insert also the Virtual Network, as showed in figure 3.
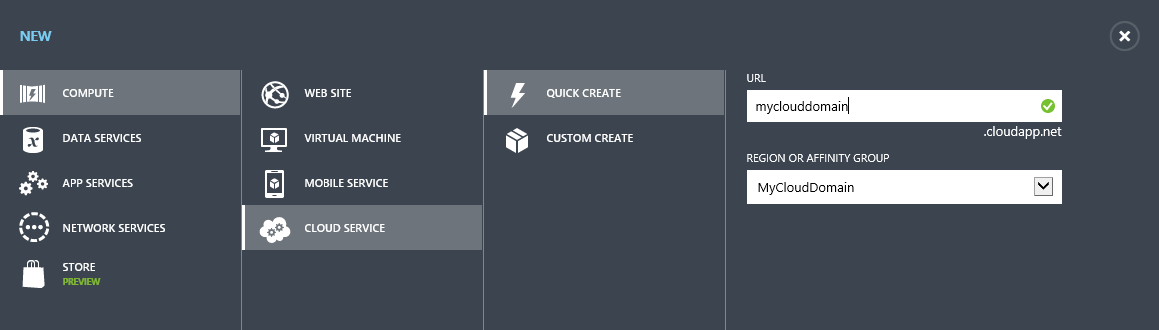
Figure 3 – Cloud Services Creation
Now it’s time to create the Virtual Machine; remember to select the right Virtual Network, as showed in figure 4.
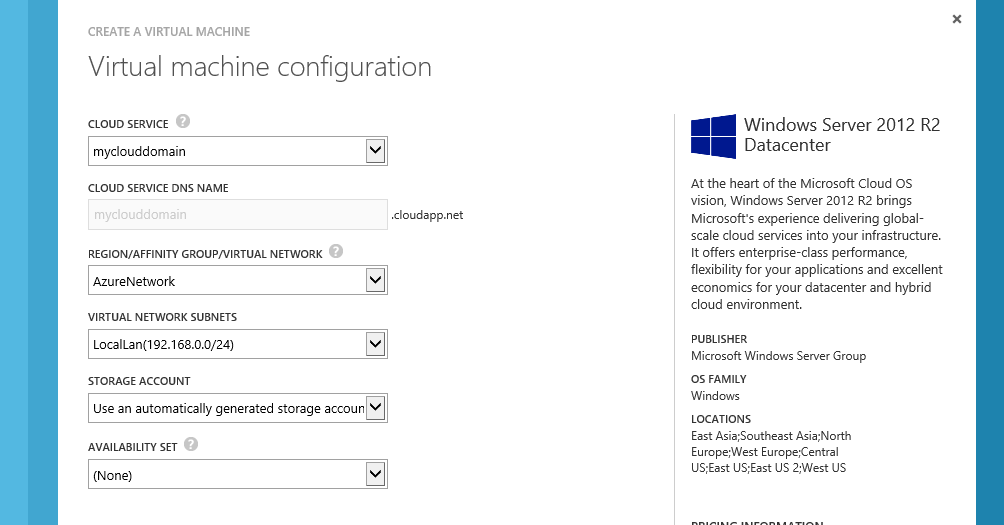
Figure 4 – VM Creation
The Virtual Machine will have a dynamic IP address included into Virtual Network, as showed in figure 5. For more security you can also change it into a static IP (this is better for DC).
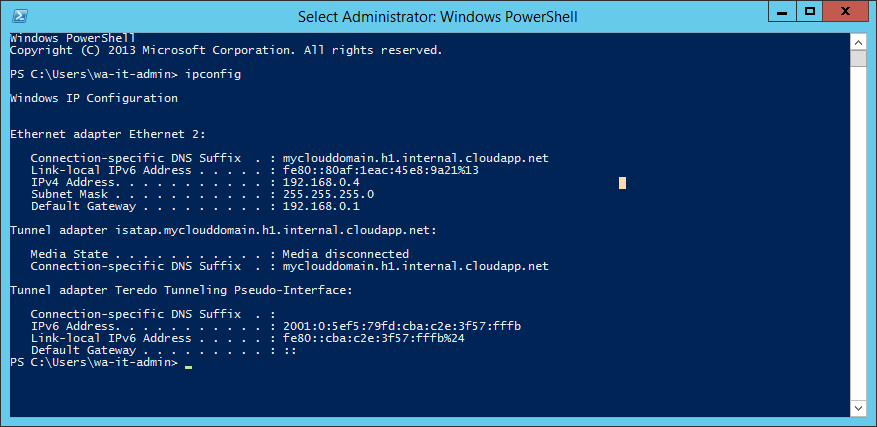
Figure 5 – VM IP Address
The first machine is the Domain Controller so you need to create the domain. After the domain’s creation it’s possible change the Virtual Network to assign automaticaly the DNS Server address, as showed in figure 6.
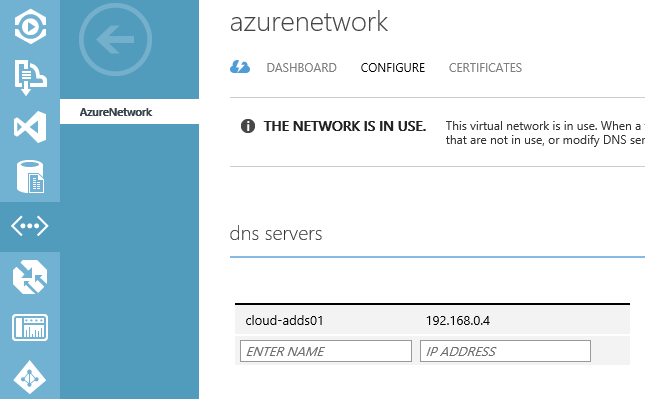
Figure 6 – DNS Server Assignment
The others VMs should be created in the same mode like the first; be careful to select the right Cloud Services. The IP Address and the DNS will be provided by Virtual Network so you can join it into your domain without problem. To see if you have do a good work, run Get-ADComputer cmdlet from PowerShell console….this shows you all the computer in the domain, as showed in figure 7.
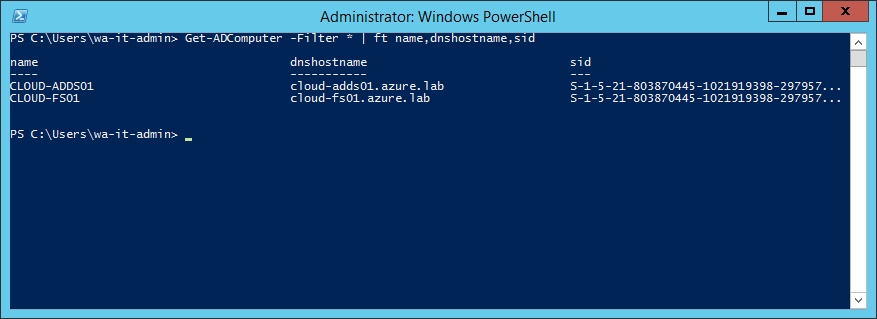
Figure 7 – Computer List
That’s it! In around 20 minutes you have create a lab environment with two virtual machines that you can use wherever you want. Remember that you can try Windows Azure for 30 days with a credit of 200$ for the first month.
S